Cozi Jacket Sewalong, Part 2: Assemble the Bodice
Click here to purchase the Cozi Jacket sewing pattern
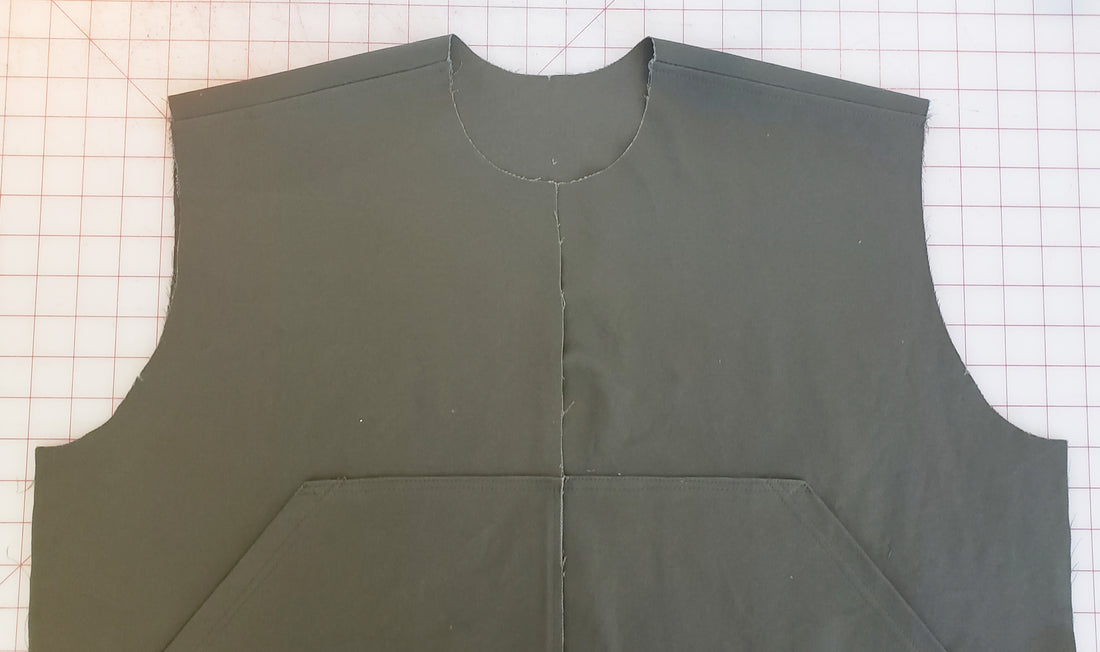
Attach the Front and Back Bodices
Align both Front Bodice pieces to the Back Bodice at the shoulders, right sides together. Sew the shoulder seams with a 5/8" (1.5 cm) seam allowance.

Trim the seam allowance to 1/4" (6 mm) by serging, or you can trim and finish the allowance with a zigzag stitch to prevent fraying (shown below on a knit version).


Press the seam allowance toward the Back Bodice. Optional: Topstitch the seam allowance down with a 1/8" (2 to 3 mm) allowance.
Optional, if sewing woven fabric: finish the seam with a flat felled seam. Start by trimming one side of the seam allowance (in the photos below, I trimmed the front bodice seam allowance, but it is usually recommended to press shoulder seams toward the back, so you would actually want to trim the back bodice seam allowance. Oops!).

After trimming one side, press both seam allowances toward the wider seam allowance.

Then fold the wider seam allowance in half, covering the trimmed seam allowance and press.

Next, fold and press both seam allowances to the opposite side, concealing the raw edges in the fold.


Topstitch the folded seam allowance in place (you can do this from either side, and I chose to topstitch from the exterior, checking occasionally to make sure my topstitching was catching and securing the fold in the interior.


Attach the Sleeves
Open the bodice assembly and lay flat with the right side of fabric facing up. Align the sleeve cap, face down, with the armscye and align the notches indicating the front and back of the sleeve cap/armscye.


Sew the sleeve to the bodice with a 5/8" (1.5 cm) seam allowance and finish the seam with your preferred method.

I prefer to serge my sleeve seams (shown below) because I think it is more comfortable to wear.

Press the sleeve away from the bodice with the seam allowance pressed toward the bodice. Optional: topstitch the seam allowance down to the bodice with a 1/8" (2 to 3 mm) allowance.


Sew the Sleeve and Side Seam
Align the front and back bodice right sides together and sew the sleeve seam and side seam in one seam with a 5/8" (1.5 cm) seam allowance. Finish the seam allowance with your preferred method.

Press the seam allowance toward the back of the bodice and sleeve. For this sample, I finished this seam with another flat felled seam.

It was a little tricky to topstitch the seam down close to the sleeve hem, so I stopped about 2" (5 cm) short of the sleeve hem and trimmed the seam allowance down to about 1/8" (3 cm) since I'll be turning a wide hem here later and it will be concealed.

Prepare the Hem
If using woven fabric, turn the hem by 3/8" (1 cm) toward the wrong side and press. This will conceal the raw edge on the interior of the garment when the hem is finished in a later step.

If using knit fabric, serge the bottom edge of the bodice (optional). This edge will be visible and lay flat on the interior of the garment when the hem is finished in a later step.