How to Trim a Metal Zipper
Pattern Scout now has three patterns featuring zippers, and it seemed like high time I did a quick little tutorial on trimming a zipper. Zipper installation, in general, can feel a little daunting for new sewists, and shortening a zipper was something I avoided in previous projects because I didn't want to add extra work to my projects. But now I am a zipper shortening advocate. It's really not that bad!
If using a nylon coil or plastic zipper, trimming is fairly straightforward and not super complicated. However, for both of these types of zippers, I recommend creating a new way to stop the zipper pull by either extending/curving the zipper into your seam allowance or adding a new stop (this can be done by sewing several stitches over the existing teeth to create a thread stop or by adding a new metal stop, which I'll show below).
If using a metal zipper, I recommend taking the following steps to trim the zipper and remove the teeth for a nice and clean finish.
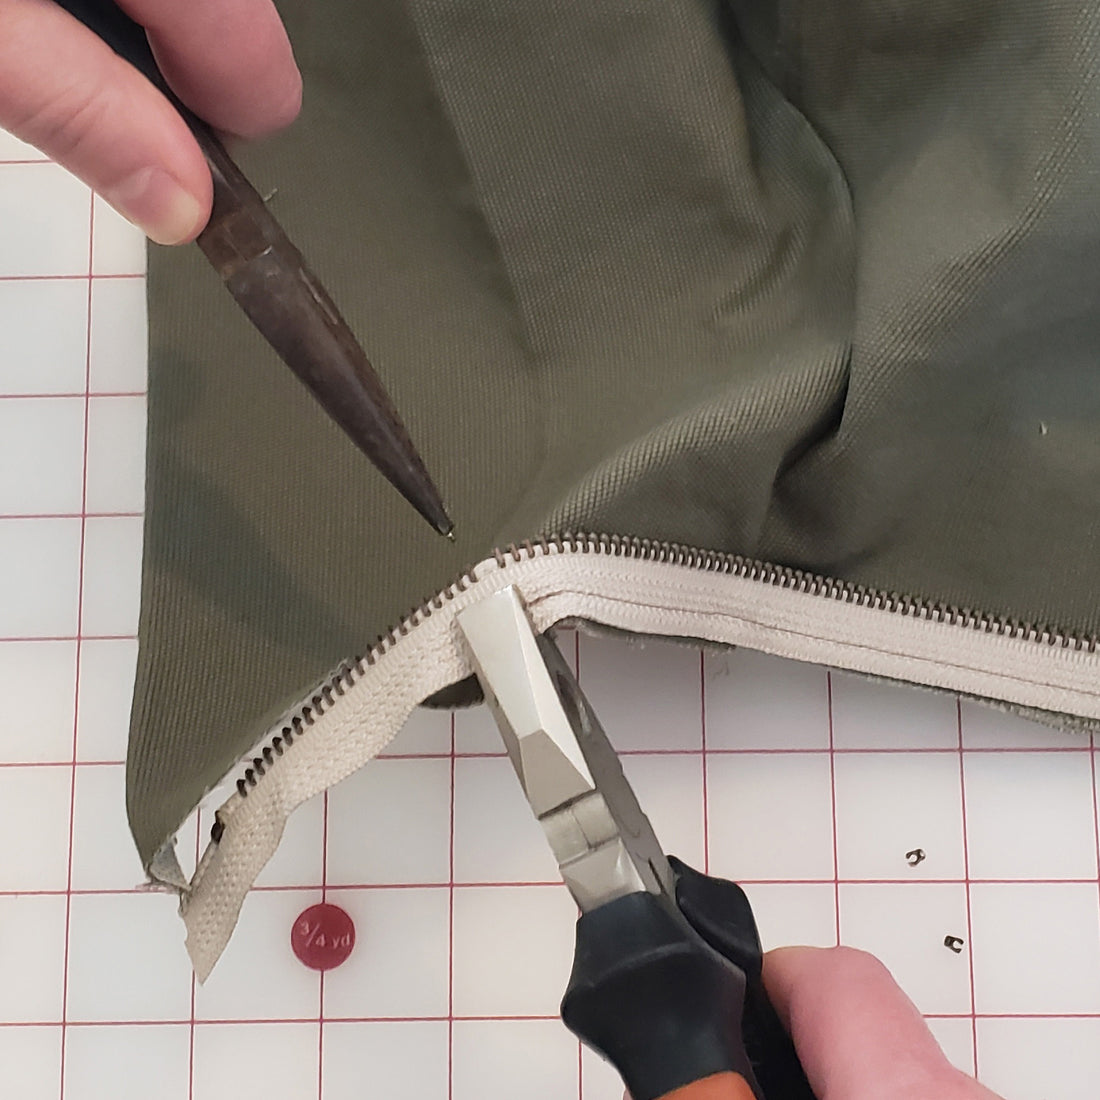
STEP ONE: Remove the zipper teeth from the TOP of the zipper
Once you decide how long the zipper needs to be, remove any zipper teeth that will end up in your seam allowance or extend beyond the desired length. Do this from the top of the zipper--you want to leave the bottom of the zipper in tact.
I like to remove 4 to 5 teeth, depending on the size of the zipper (in this case, a #5 metal YKK zipper) so that I have about 1/2" to 3/4" (1 to 2 cm) of zipper tape extending beyond where I want the zipper to stop.
To remove the teeth, it helps to have two sets of pliers: one that has a wide, flat gripper thingy (ha! what is the term for the part that grabs the things??) and one pair of needle nose pliers. Use the wide flat pliers to hold the tape, with the edge of the pliers right against the teeth. The needle nose pliers should grab the tip of the teeth (so that you're only pulling the tooth and not inadvertently pulling the threads of the zipper tape). then clamp down and pull them apart to remove the tooth from the tape. Repeat this step for each of the teeth you want to remove. It takes a little muscle, but if you grab the very tip of the teeth it is much easier to release them from the tape.
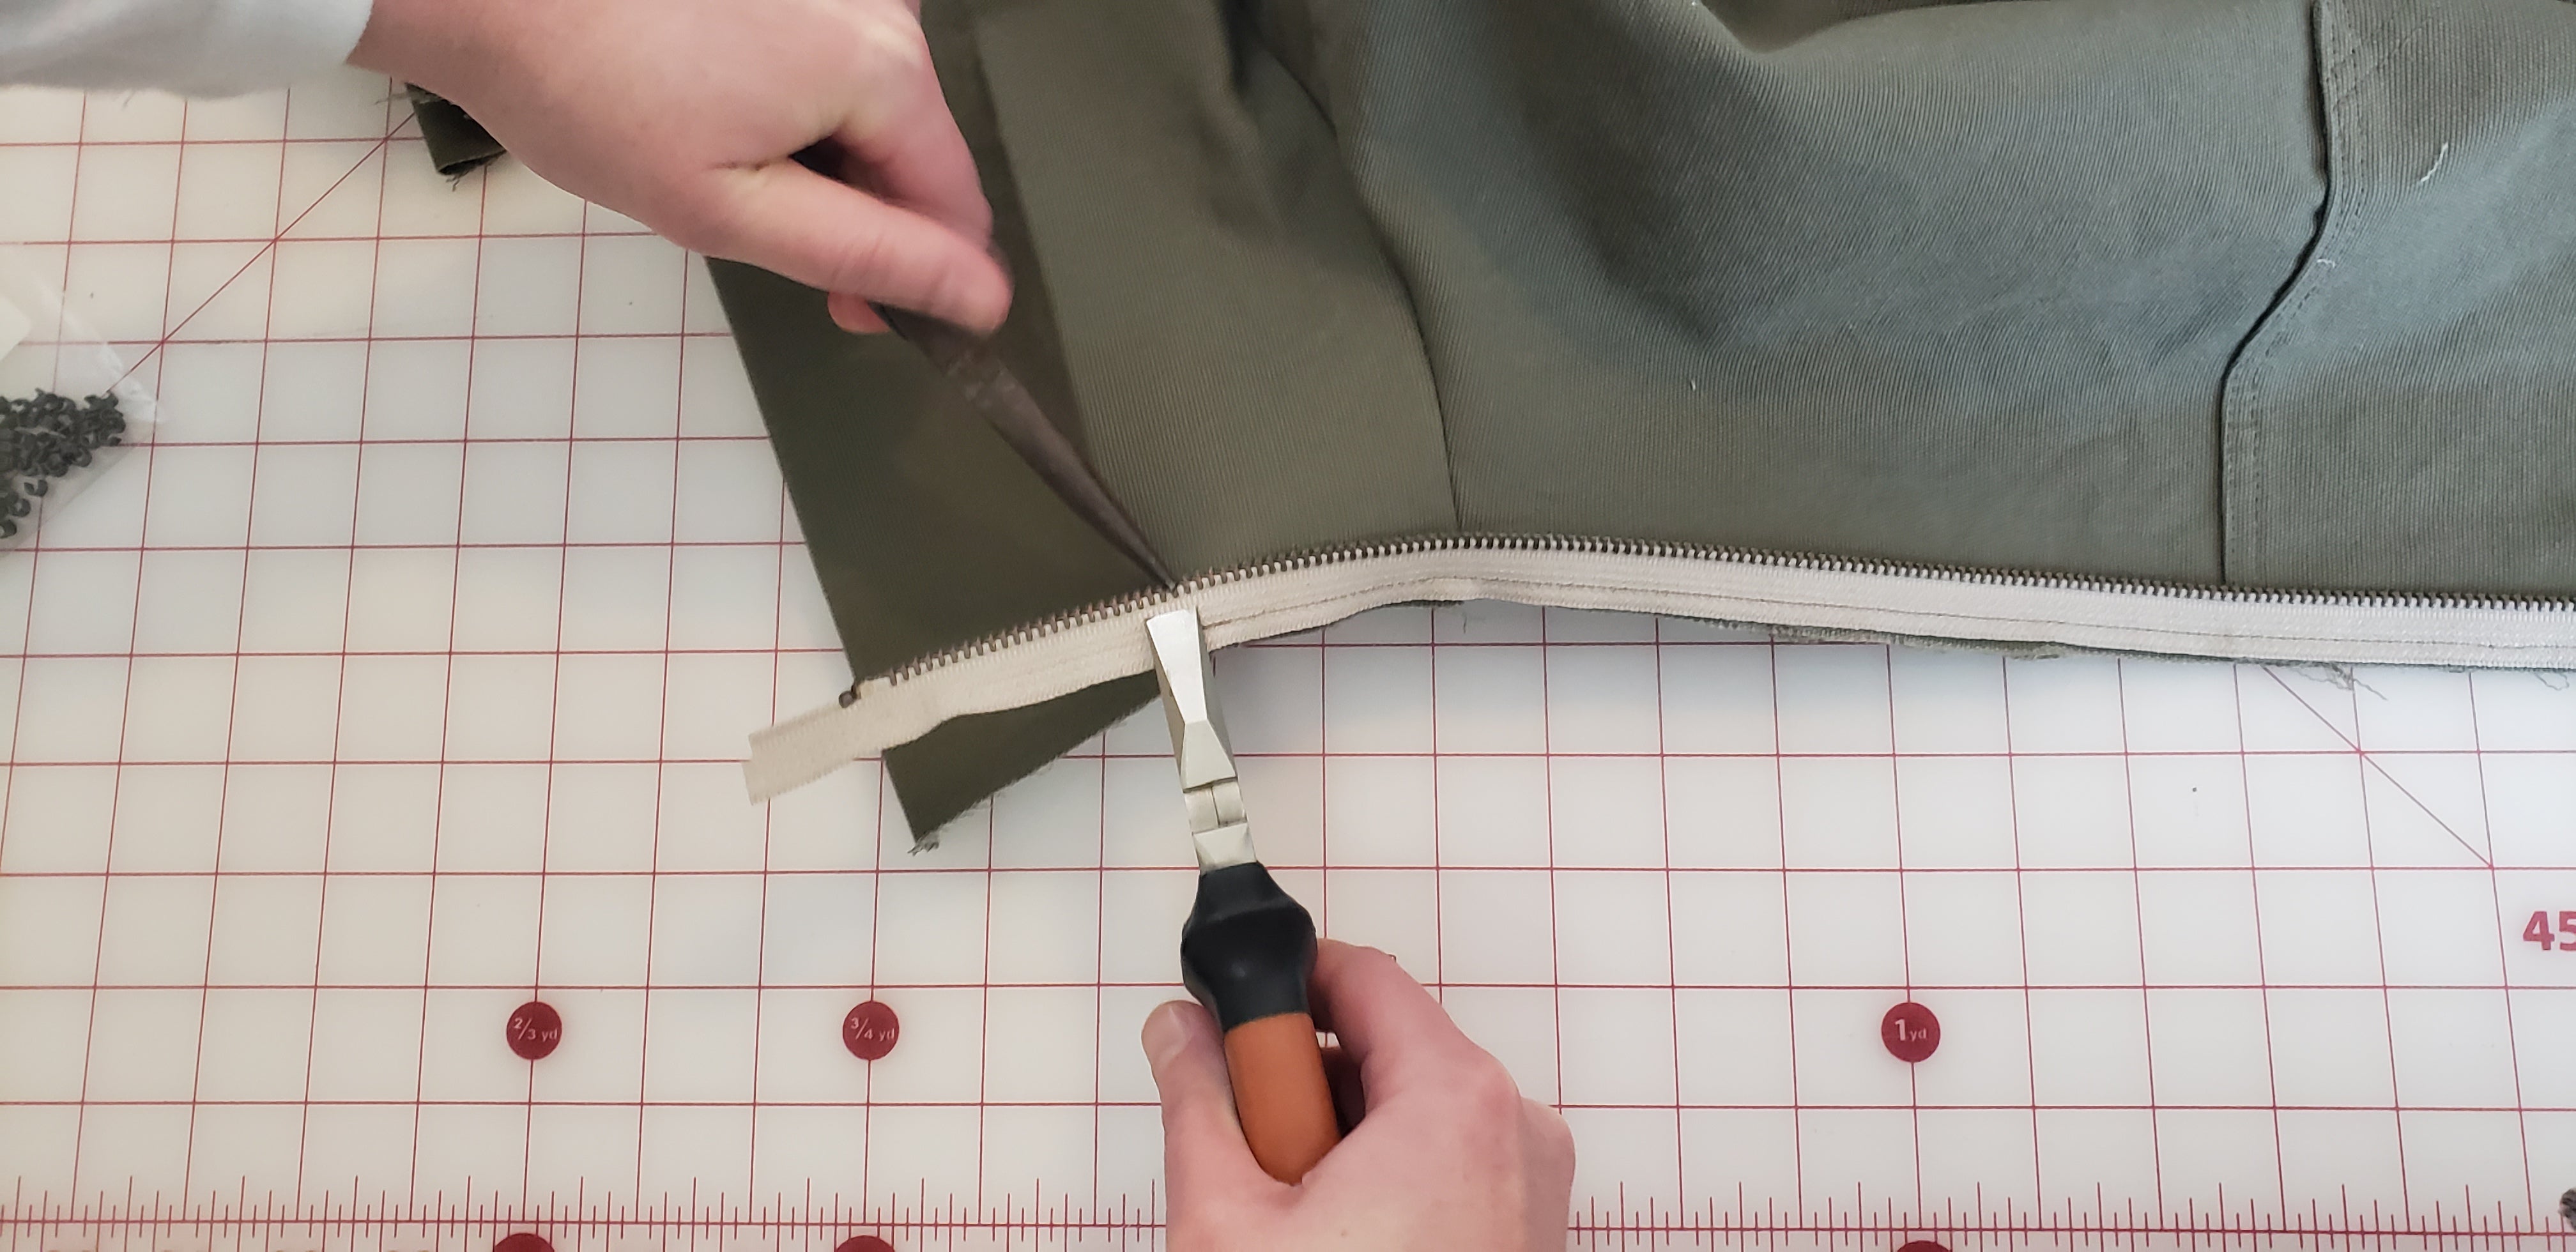


STEP TWO: Add a new zipper stop
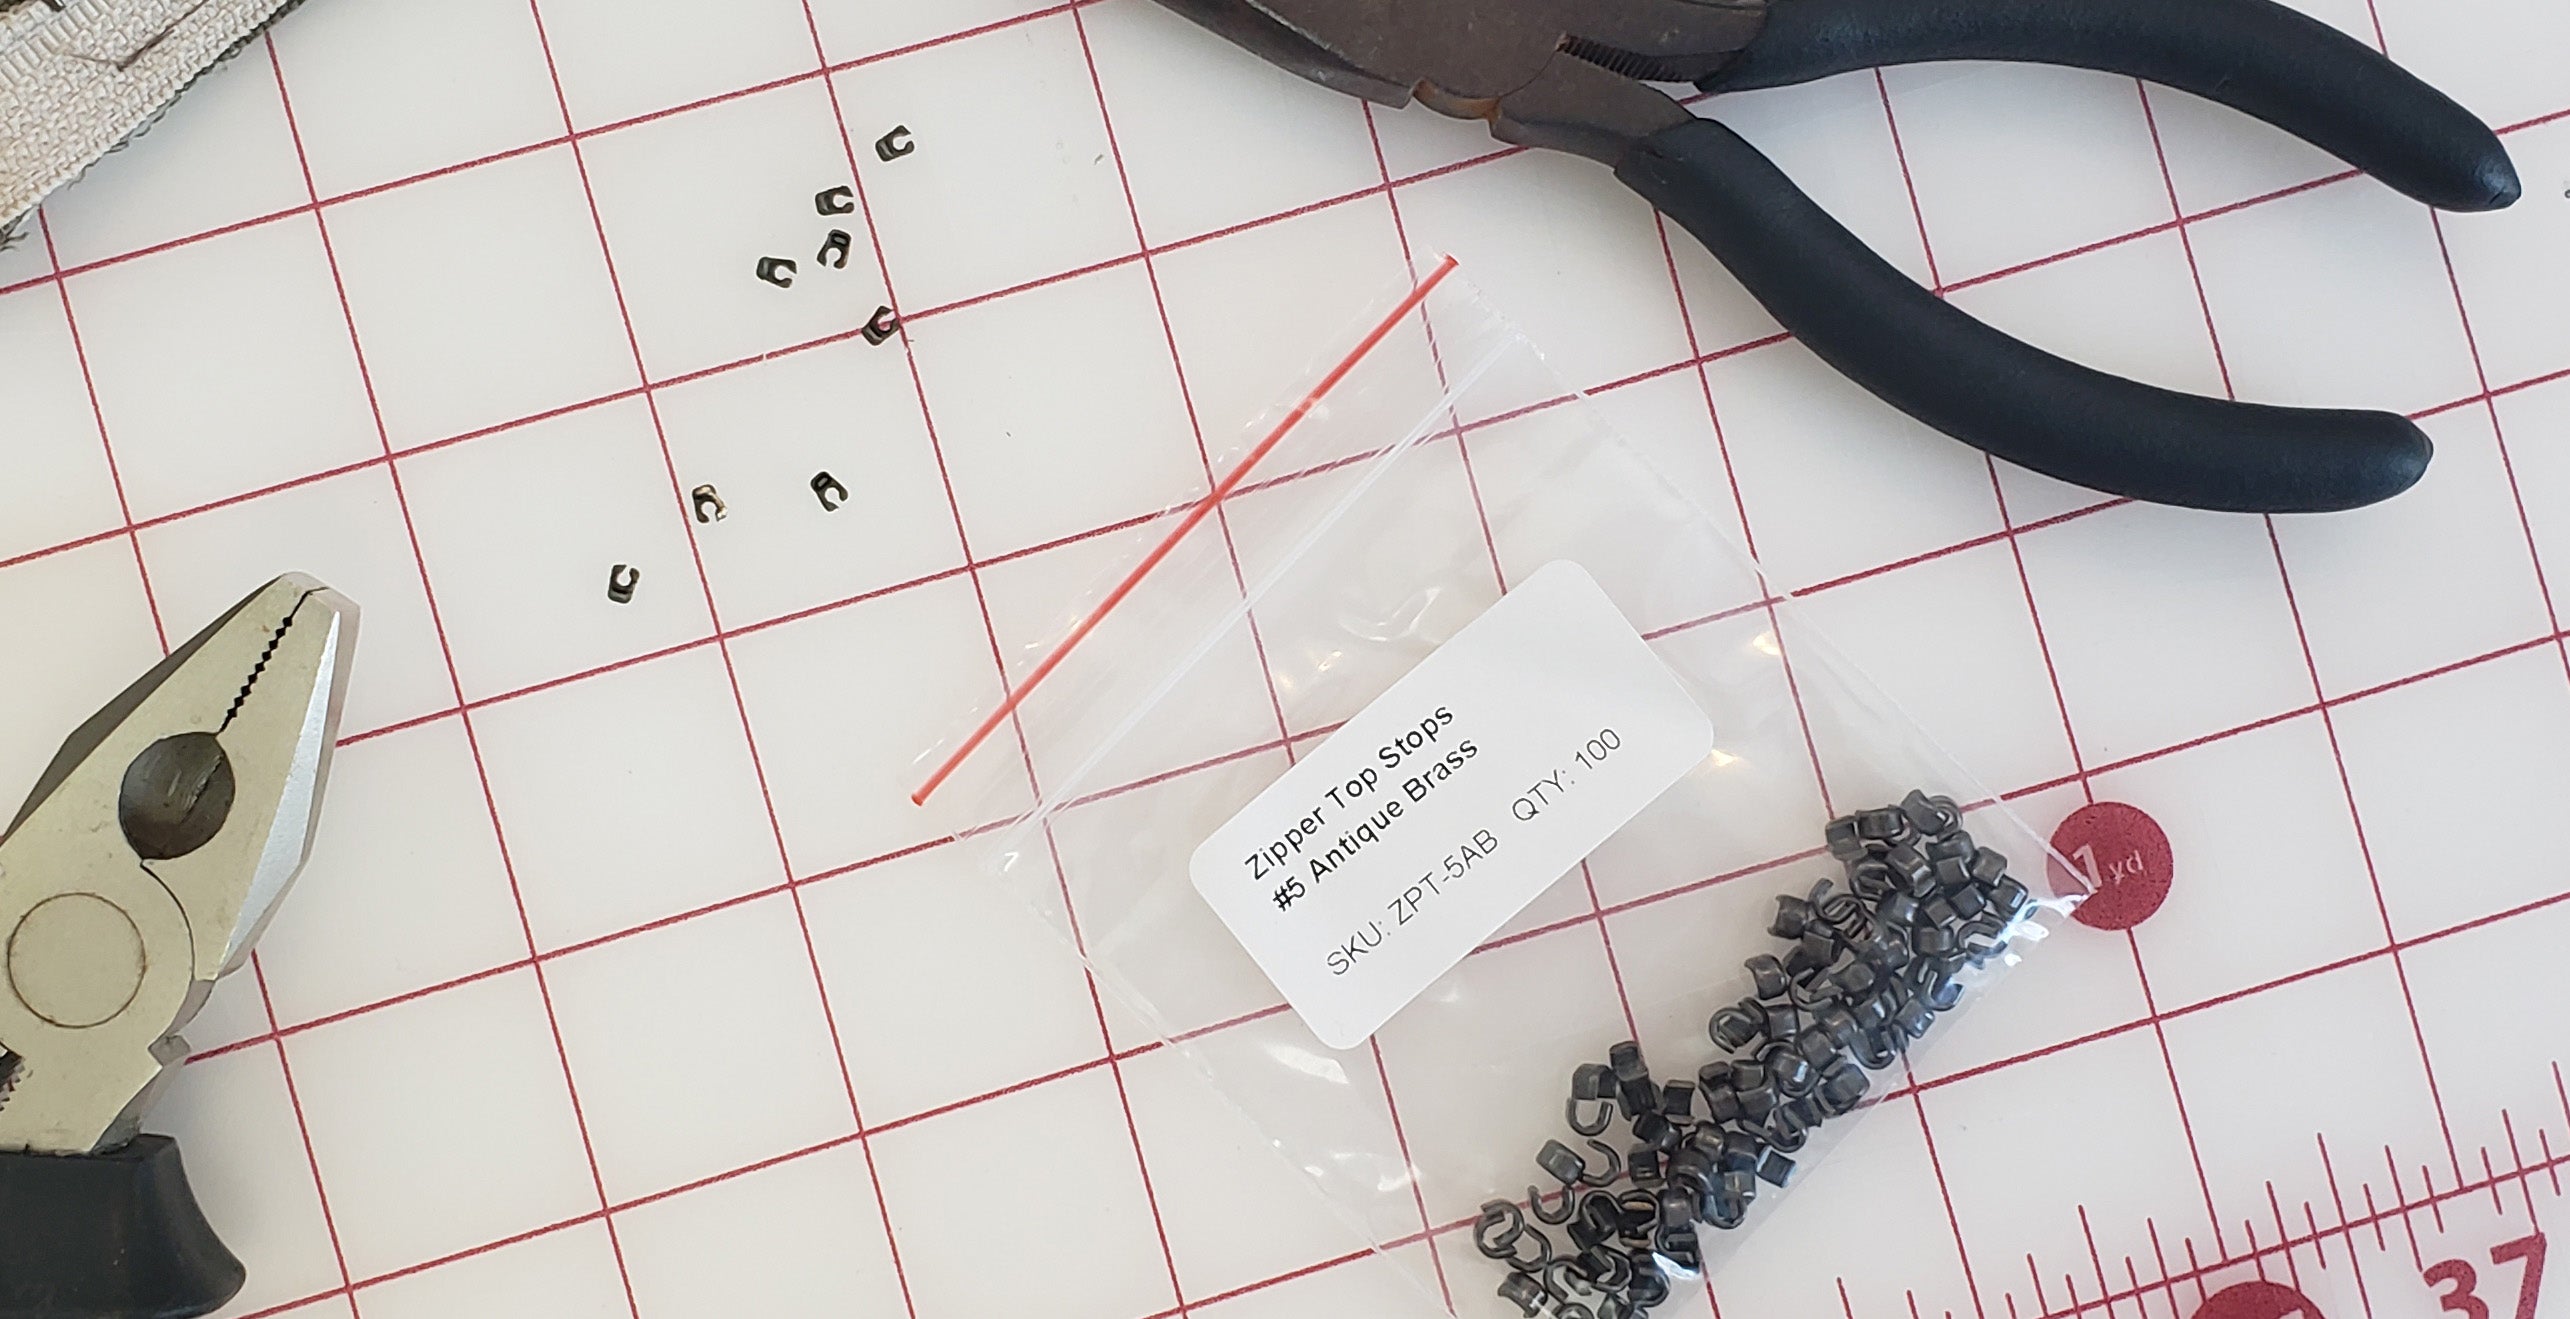
Now, you could fold down the top of the zipper tape of the zipper teeth to create a stop in a pinch, but this is not ideal and the pull may still slip off those last teeth. I highly recommend investing in some extra zipper stops--they are just a few bucks and come in packs of 100 or more, so you can shorten a lot of zippers! I bought mine at wawak.com, but if you search for "zipper stops" you can find them pretty easily online. I bought the #5 stops. I typically use #3 and #5 zips so #5 will cover me for both.
Position the stop right next to the last zipper tooth and clamp it firmly into place to secure it to the tape. You also want the stop to be as far into the tap as possible. there should be no space between the tape and the interior curved portion of the stop.


STEP THREE: trim away the excess zipper tape
You should have a little excess tape beyond the stop that is teeth-free. Trim the tape, leaving that little extra (about 1/2" to 3/4" (1 to 2 cm), which can be anchored into a seam allowance or folded over for a clean finish.


STEP FOUR: Repeat for opposite side of zipper
Zip the opposite side of the zipper back onto the one you just trimmed and use the same steps to remove the teeth at the same location.


And that is it! Pretty darn easy, right?
