Luna Crossbody Sewalong: Part 6, Installing the Zipper
If you’ve never installed a zipper, or if you have and it was a disappointing experience, you may have written them off entirely (in a former life, I thought I’d never sew them. I was just like, “Nope. Not sewing zippers. Ever. #buttonsforlyfe!”). But once you master the zipper? You open up a whole new world of possibilities in pro-level sewing.
I’m going to hold your hand through the entire process. So let’s do this.
First, let’s prep the zipper:

Fold the ends of the zipper tape under the zipper at a 45 degree angle and baste.
This step will keep the ends of the tape clear of the seam allowance when we assemble the purse body later. Do this on both ends.
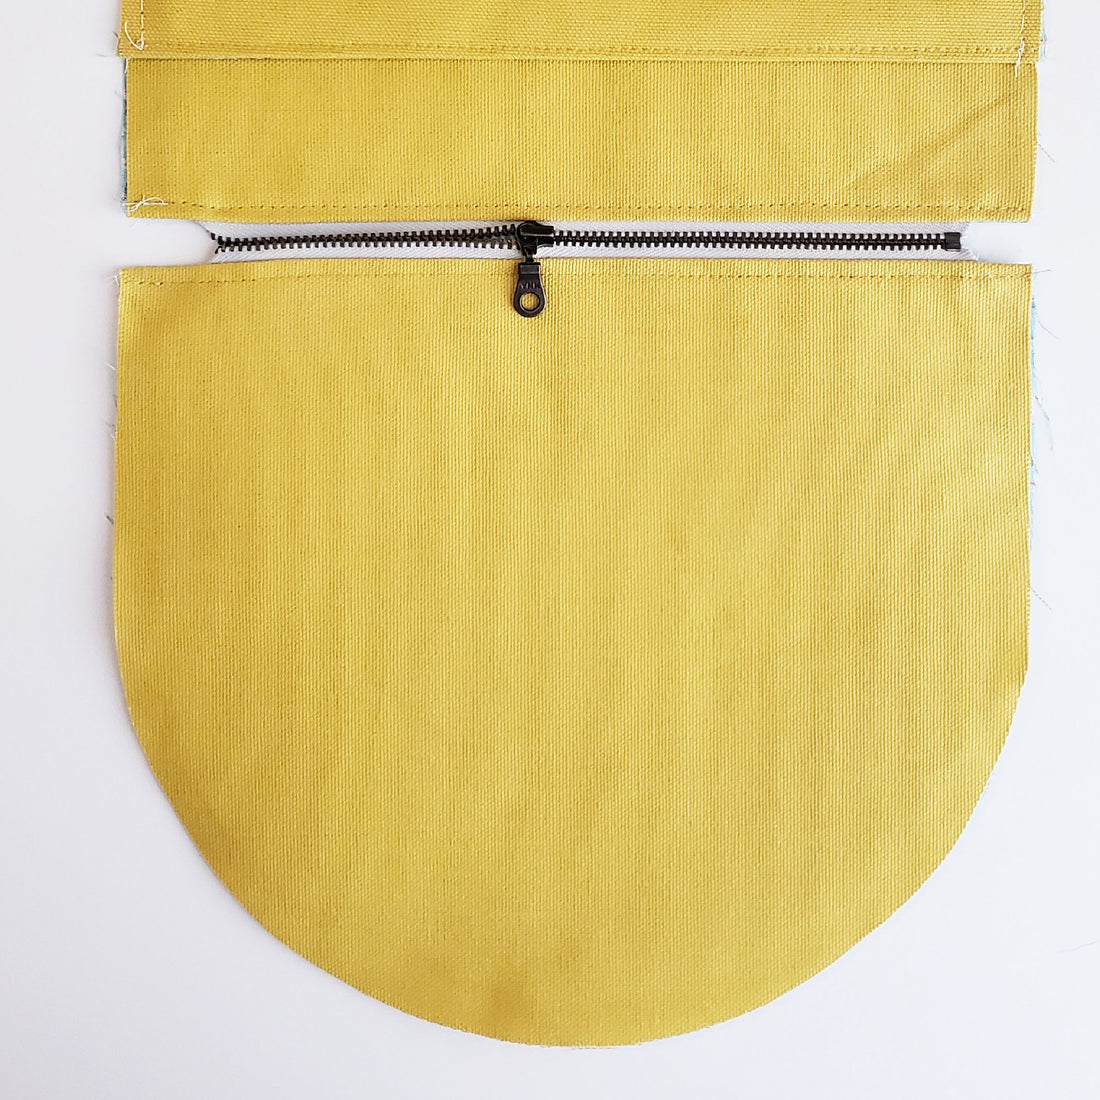
Now, lay the Main Body (the side you just attached the Outer Pocket to) face up. Lay the zipper face down along the top edge of the Main Body, leaving about 1/16” gap between the zipper tape and the top of the Main Body piece. Make sure the zipper is centered.
Baste the zipper in place.

(The zipper I used was a little too long, so I had to trim it, which shows in the photo. When this happens, I will wait to trim it until after I have basted it to the body. Also, I turned the end the wrong way on the trimmed/right side in this photo! It should be turned up—toward the bottom of the zipper—as shown on the left side.)
With the Main Body still facing up, lay the Lining (the side that does NOT have the Interior Pocket) face down on top and align all the edges. Pin in place.


Now is the time to switch your presser foot to a zipper foot if you have one for your sewing machine. If you don’t have a zipper foot, that is ok. You’ll just have a more narrow seam allowance at the zipper with a regular presser foot.
Stitch the zipper in place with a 3/8” seam allowance. Stop halfway to lift the presser foot, open the zipper past the needle, then lower the presser foot again to allow you to sew the entire length without getting hung up on the zipper.


Once you have the zipper sewn in, press the Main Body and Lining back away from the zipper with wrong sides together, exposing the zipper. Topstitch the top edge to secure everything in place.


Repeat these steps for the opposite side, making sure to maintain the same 1/16” gap between zipper and top of opposite Main Body piece when basting.

1. Main Body pieces right sides together

2. Align zipper face down with top (maintain 1/16” gap at top)

3. Baste zipper to Main Body

4. Opposite side of Lining (with Interior Pocket) face down, right sides of Lining together

5. Align top of Lining with top of Main Body and pin in place. Sew at 3/8” seam allowance with zipper foot.

6. Press Main Body and Lining away from zipper and topstitch top edge.
And that’s it! Your zipper is in! Here’s what it should like like from the exterior and the interior:


In the next post, we’ll cover making and installing piping for the perimeter of the bag.