Luna Crossbody Sewalong: Part 5, Assembling the Pockets
Next up: Pockets!
The Luna Crossbody has two main pocket assemblies. There is a large slip pocket on the exterior with an invisible magnetic closure (this is where I keep my phone—it’s always right by my side in that pocket for easy access). And the interior pocket is designed to hold credit cards and a few small items, like loose change or chapstick (I have chapstick stashed EVERYWHERE. It’s a necessity, amiright?).
Interior Pocket
Let’s start with the interior pocket. First, you’ll want to fold it accordion-style following the fold lines. Your goal is to make the card slots out of one piece of fabric, so each fold will be a card slot. Fold each section individually (starting with the longest section), pressing the folds as you go and realigning the entire assembly after each fold. This step takes a little patience, but hang in there! Use the edges of the interfacing as a guide for each fold. When you are done folding and pressing, you will end up with the folds enclosed in the assembly and right sides of your fabric on the exterior.


Topstitch the front two folds to finish the edges (wait to topstitch the top/back fold…we’ll do that one in a few steps). Make sure you only topstitch the fold, and do not stitch it to the fabric behind. You want to be able to slip your credit cards into the folds after it is sewn to the lining.


Next, with your folded pocket still facing up, unfold the back fold (the longest piece). Baste each side of the pocket, securing the two topstitched folds to the pocket assembly in preparation for the next step.

Fold the the fabric (that you just unfolded) back over the pocket assembly, right sides together, lining up the raw edges and corners and concealing the topstitched folds.

Sew around the 3 raw edges, leaving a 3 to 4 inch opening along the bottom edge for turning. Trim the corners to reduce bulk.

Turn the pocket right side out, poking out the corners with your finger or a turning tool. Tuck the raw ends of the opening at the bottom into the assembly. Press so that you have a rectangular piece. Now you can topstitch the top fold (which I’m realizing I forgot to do…oops! Do as I say, not as I do :) ).

Next we will attach the pocket to the lining! You may have noticed that we are not interfacing our lining for the Luna. You may also feel some trepidation about this, since we’ll be attaching a stiff pocket to it, but I have tried it both ways and really prefer to not interface the lining. Doing so makes the lining too stiff and bulky, in my opinion, and prevents it from sitting comfortably inside the bag (which is already pretty narrow). Also, this purse being so small, you won’t get a lot of stress on the lining from excessive tugging and weight. However, one of the testers mentioned that she would prefer to use a lightweight interfacing for the lining, especially for a lightweight quilter’s cotton. Which is a valid point!
All this justification aside, if you want to interface your lining, doing so is totally fine. It comes down to personal preference, but It’s not necessary for the integrity of the interior pocket stress points.
Ok, where were we?! Pocket. Lining. Let’s do it…
Line up your pocket with the marks on the lining (you want to keep the bottom corners of the pocket clear of the seam allowance of the curved bottom of the lining, so about 5/8” from the edge). Pin the pocket in place and topstitch around the edge of the pocket on three sides, leaving the top open and closing the bottom where you previously turned the pocket. Then topstitch the center of the pocket to create 4 card slots on the front and two larger pockets against the lining. When topstitching the center, it is easier to prevent bunching if you start at the bottom and sew up to the top.

Nice job! now we’re ready to move on to the…
Outer Pocket
First we will attach the magnets for the closure (wait to attach it until after we sew the Outer Pocket lining to the Outer Pocket exterior). Separate the two sides of the magnetic closure from one another. One side of the magnet will be attached to the marked location on the Main Body, and the other to the Outer Pocket Lining. Pin the magnet in place through the silicone flange, centered directly on top of the mark, flat side of the magnet down on the interfaced side of the fabric.

Sew around the perimeter of the flange to secure the magnet to the fabric (shown below on the Outer Pocket Lining piece; do the same for the Main Body piece where marked).


Set your Main Body exterior with the magnet aside for now.
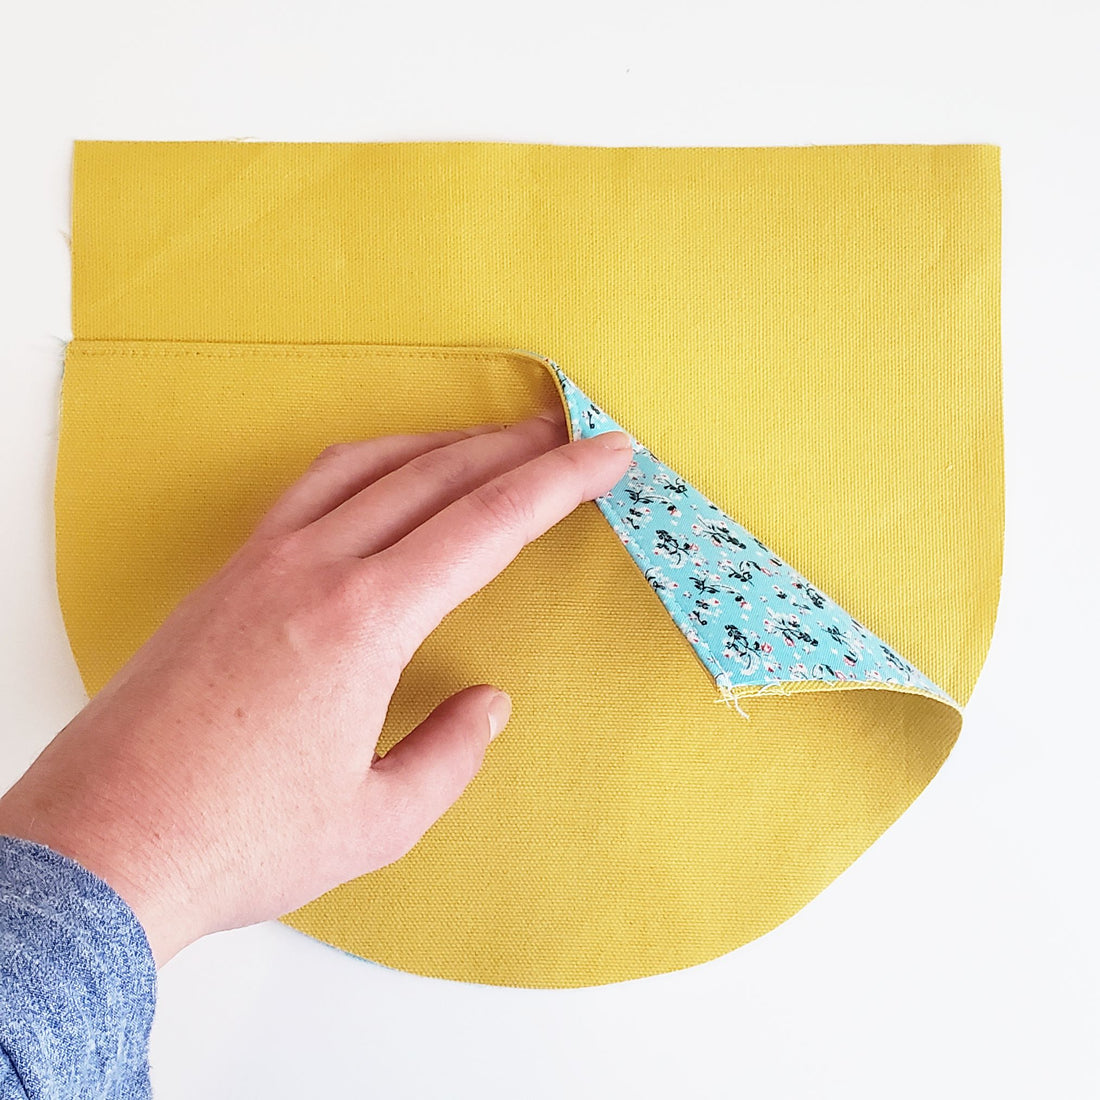
Grab your main fabric for the Outer Pocket piece and lay right side up. Pin the Outer Pocket lining, face down with right sides touching, on top of Outer Pocket exterior.


Sew across the top/straight edge, securing the two pieces to one another. Press the two sides open and away from one another, while pressing the seam open. Then fold at the seam so that the wrong sides are touching and the curved edges are aligned. Press again and topstitch the seam to create a finished top edge.


If you are using a snap closure, now is the time to attach it to the Main Body and Outer Pocket at the closure marks (you’ll create a hole through the entire outer pocket assembly for the cap side).
Ok, now grab your Main Body piece with the magnet and lay it right side up. Then position your Outer Pocket on top with the lining fabric facing down and use the magnet closures to help align everything in the right place. Baste the Outer Pocket to the Main Body along the curved edge.


And just like that, the pockets are installed! In the next post, we’ll install the zipper…