
If sewing Version B of the Lulu Cardigan Pattern, grab your ribbing and your zipper! The hem band and zipper closure give this cardigan that sporty, vintage-meets-modern style that I love. We’re almost done!
First, fold the Hem Band in half lengthwise (wrong sides together) and press. Then unfold the band and align one edge with the bottom edge of the cardigan bodice, right sides together. Pin in place and sew or serge the entire bottom edge.
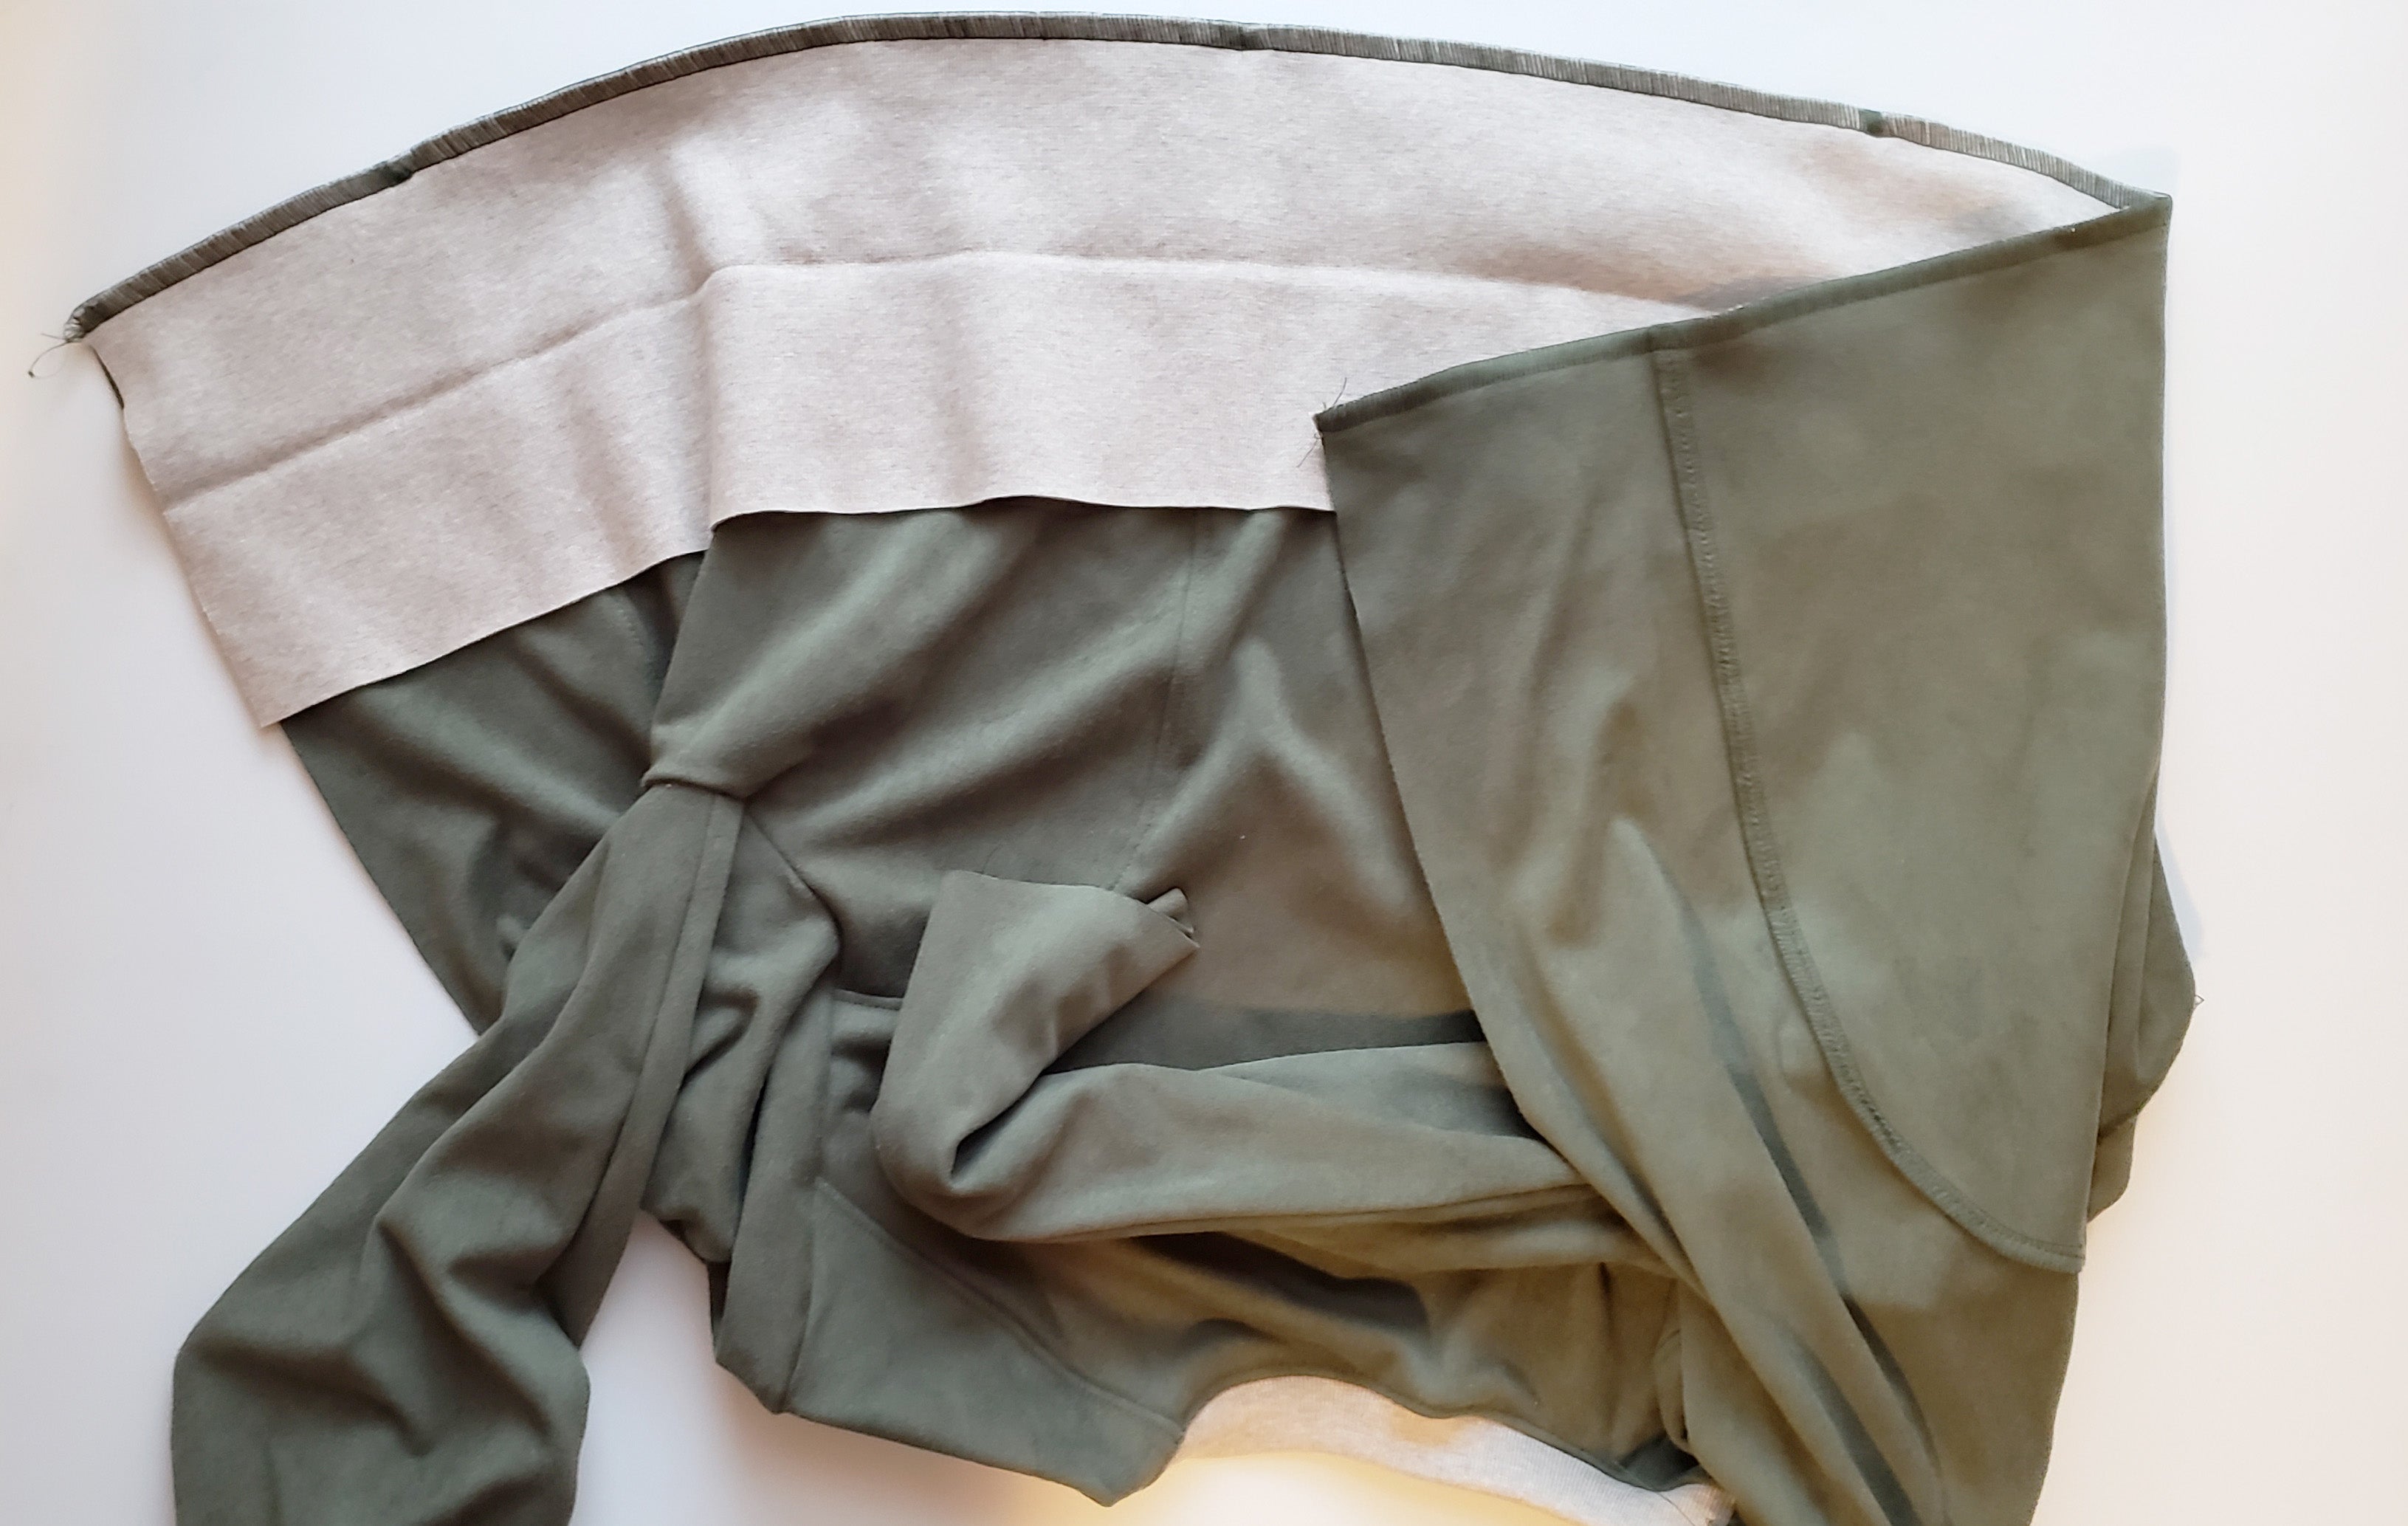
Press the Hem Band down with the seam allowance pressed toward the bodice. Now we’re going to install a zipper!
Note: a couple of testers mentioned that installing the zipper on knit fabric can be a little less daunting by interfacing the edge where the zipper will be sewn. If you do this, you’ll only need a small strip fused to the wrong side (you want it to be hidden behind the zipper fold once we are finished). I did not do it for this sewalong, but probably will for future Lulus!
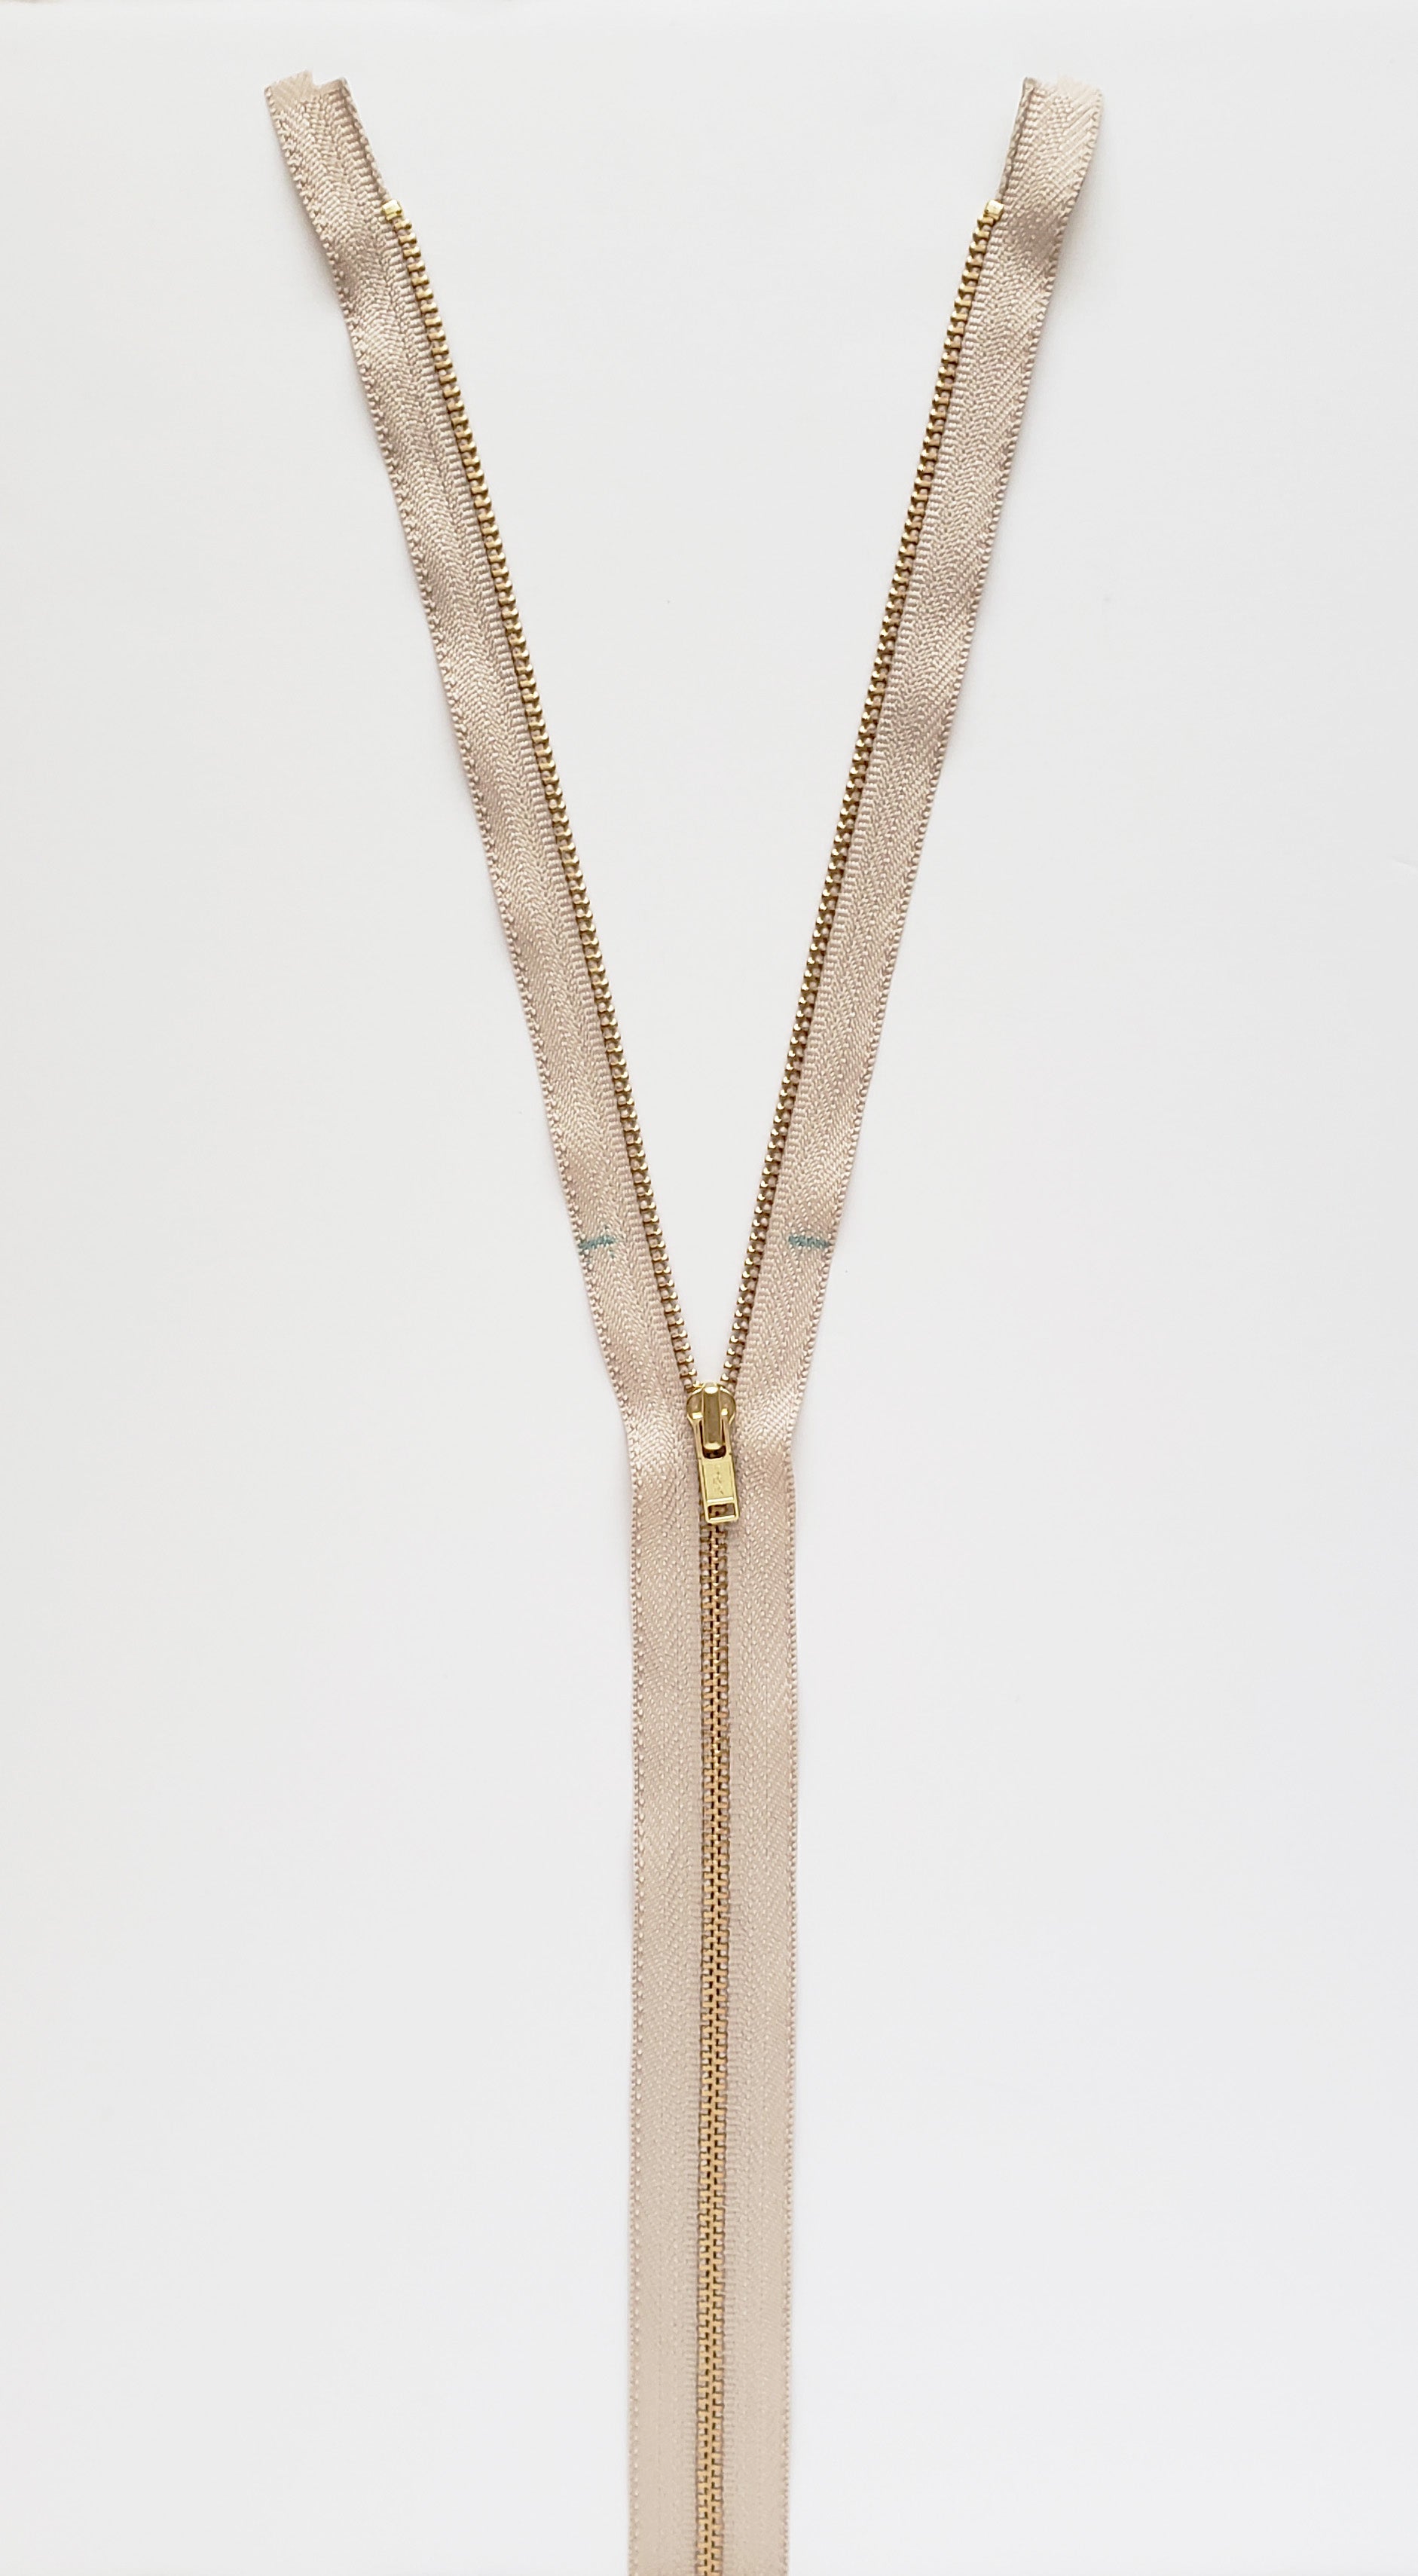
As you can see below, my zipper is WAY too long for this project, so I’ll be shortening it. Required zipper lengths are noted in the pattern instructions, but it is very likely you’ll have to shorten your zipper (and I usually buy them a little longer than I need so I can customize the length for my project).
Lay the zipper along the edge on the front opening with the bottom of the zipper aligned with the fold in the Hem Band. Mark the zipper tape approximately 1” above the neckline of the cardigan.


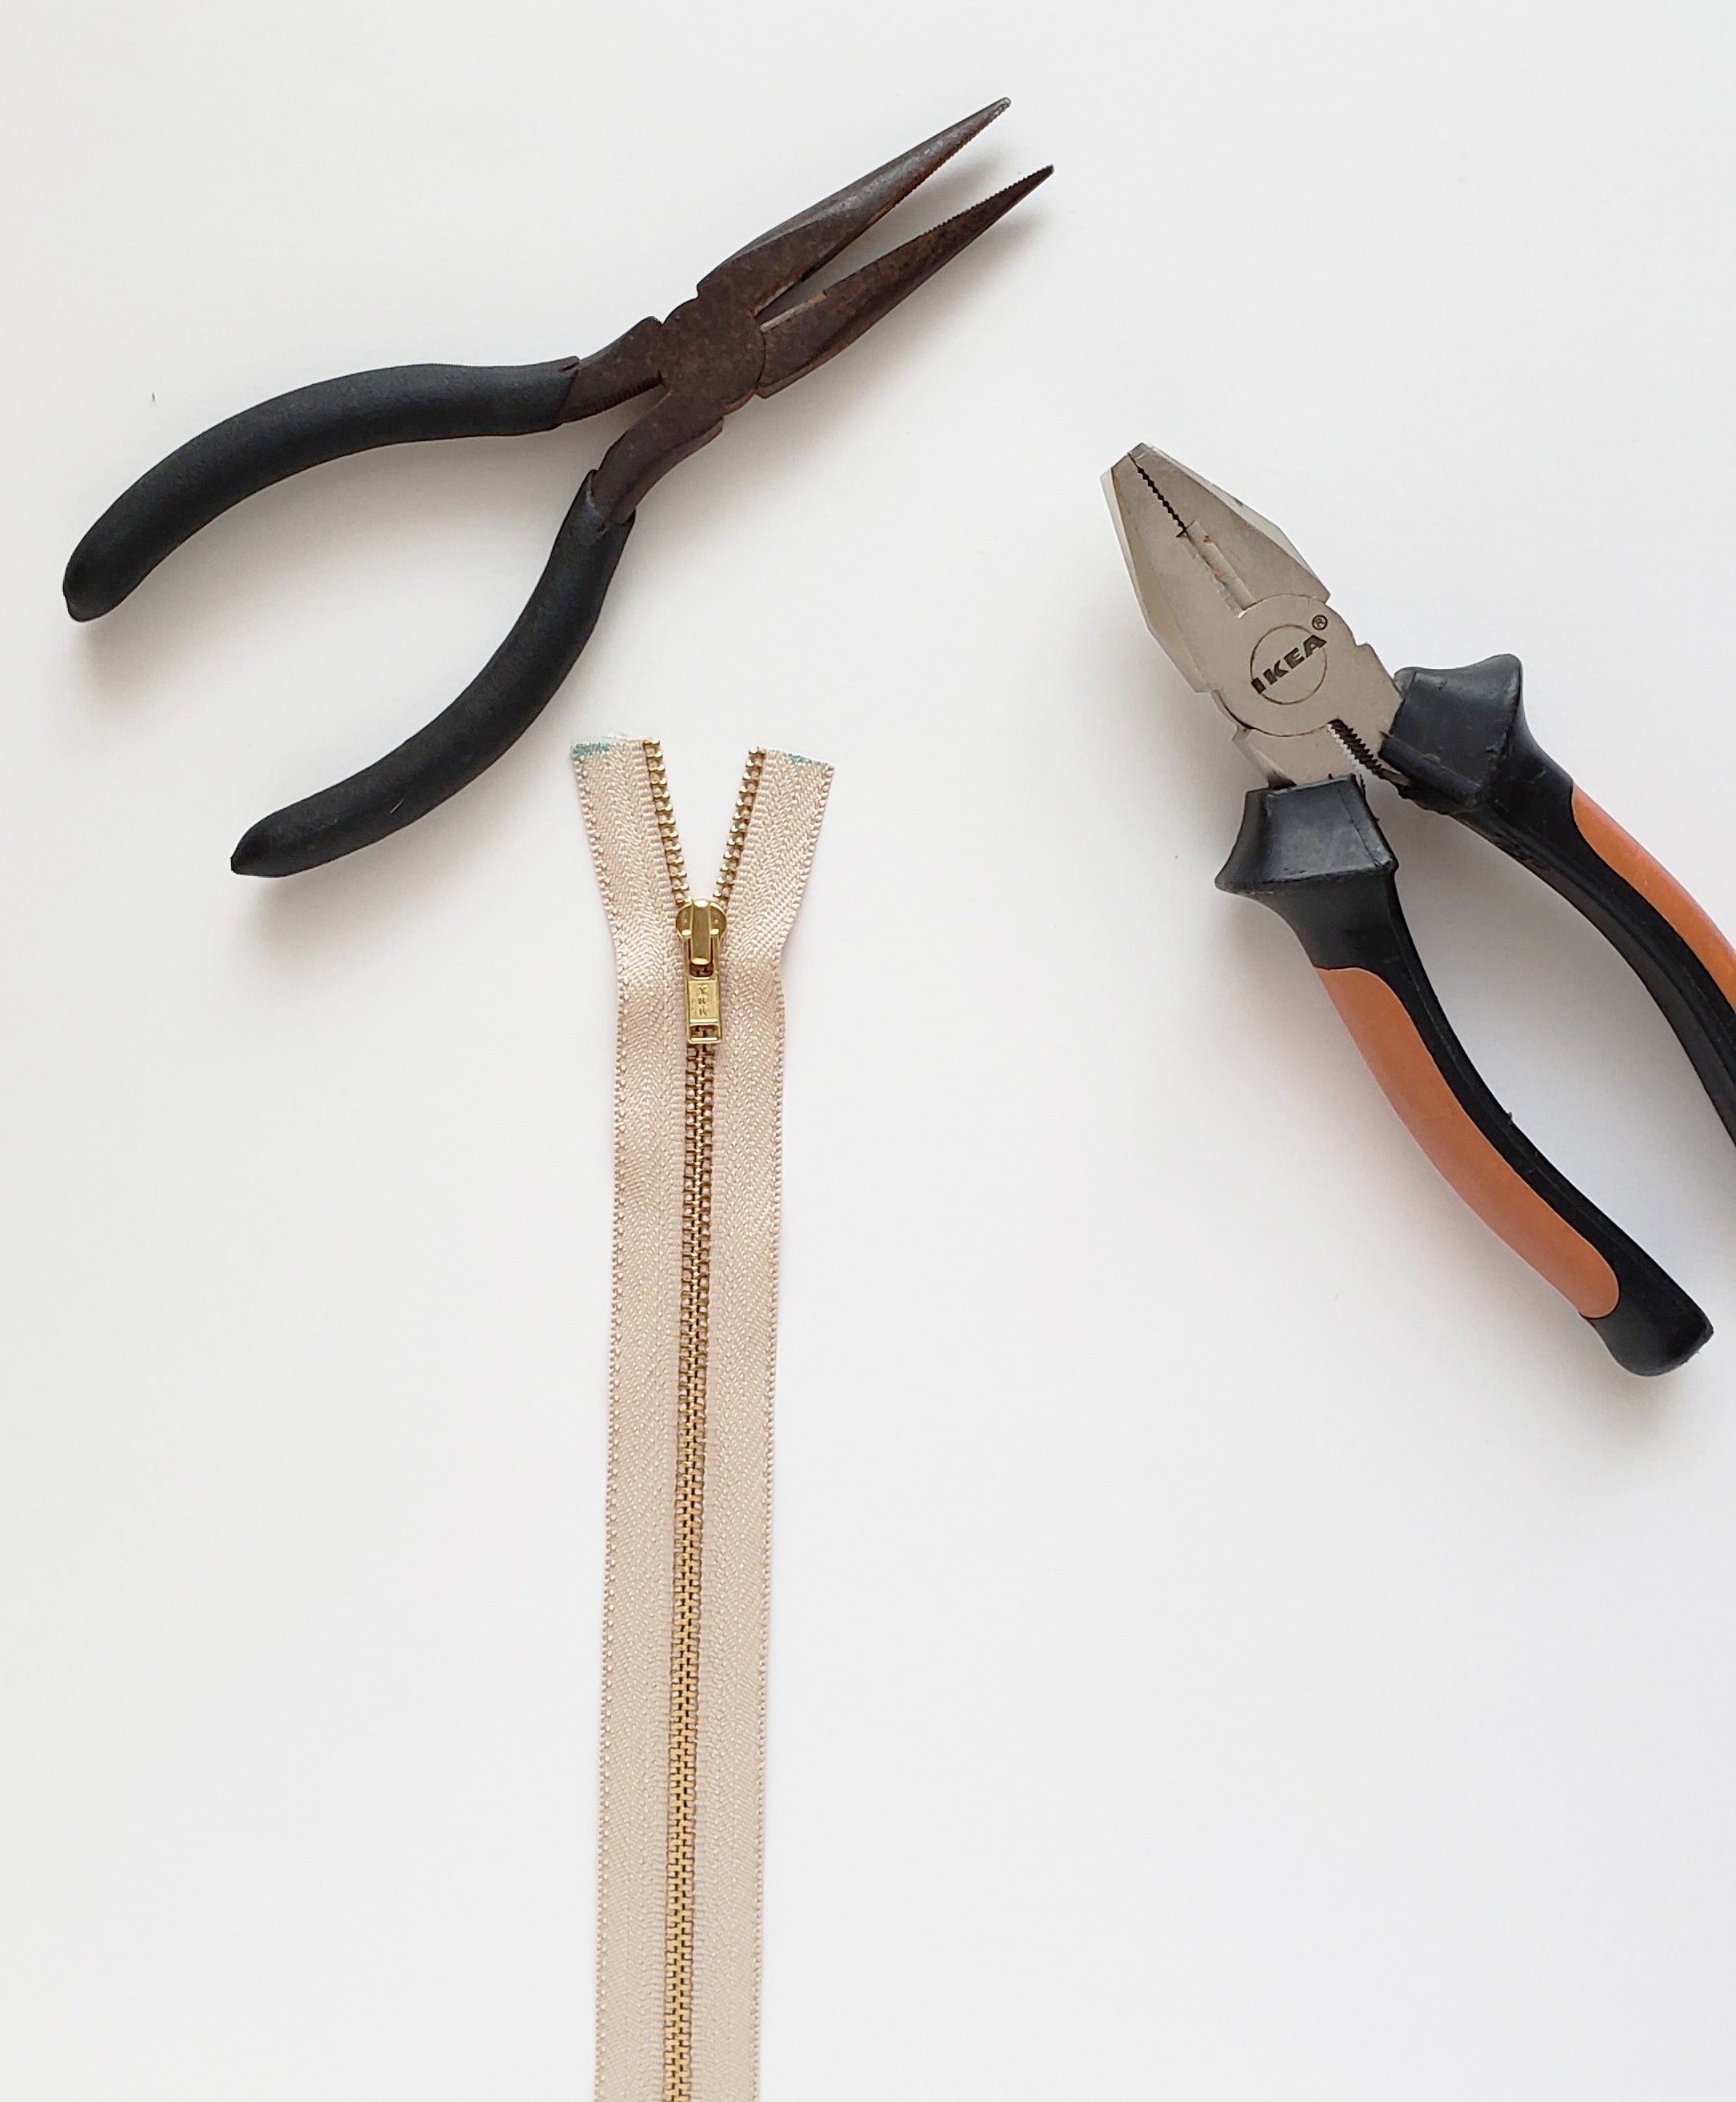
Go ahead and mark both sides of the zipper tape. Now we need to remove the zipper teeth between the top of the cardigan neckline and the marks. Below you will see that I trimmed the zipper first, but I actually recommend that you trim it AFTER you remove the teeth (I’m flying by the seat of my pants, y’all. Always). You also want to make sure that the zipper pull remains on the zipper tape, so be sure you don’t zip it off past where you are pulling the teeth off Now grad a couple pair of pliers. I used a needlenose and a flat pair (don’t know what those are called). The flat pair will allow you to grab a wide section of the zipper tape to prevent it from pulling the thread of the tape out of place. I learned this the hard way. .
Alternately, I think there are actually special pliers for removing zipper teeth, but I don’t have those and we like to live life on the edge around here! By we, I mean me…
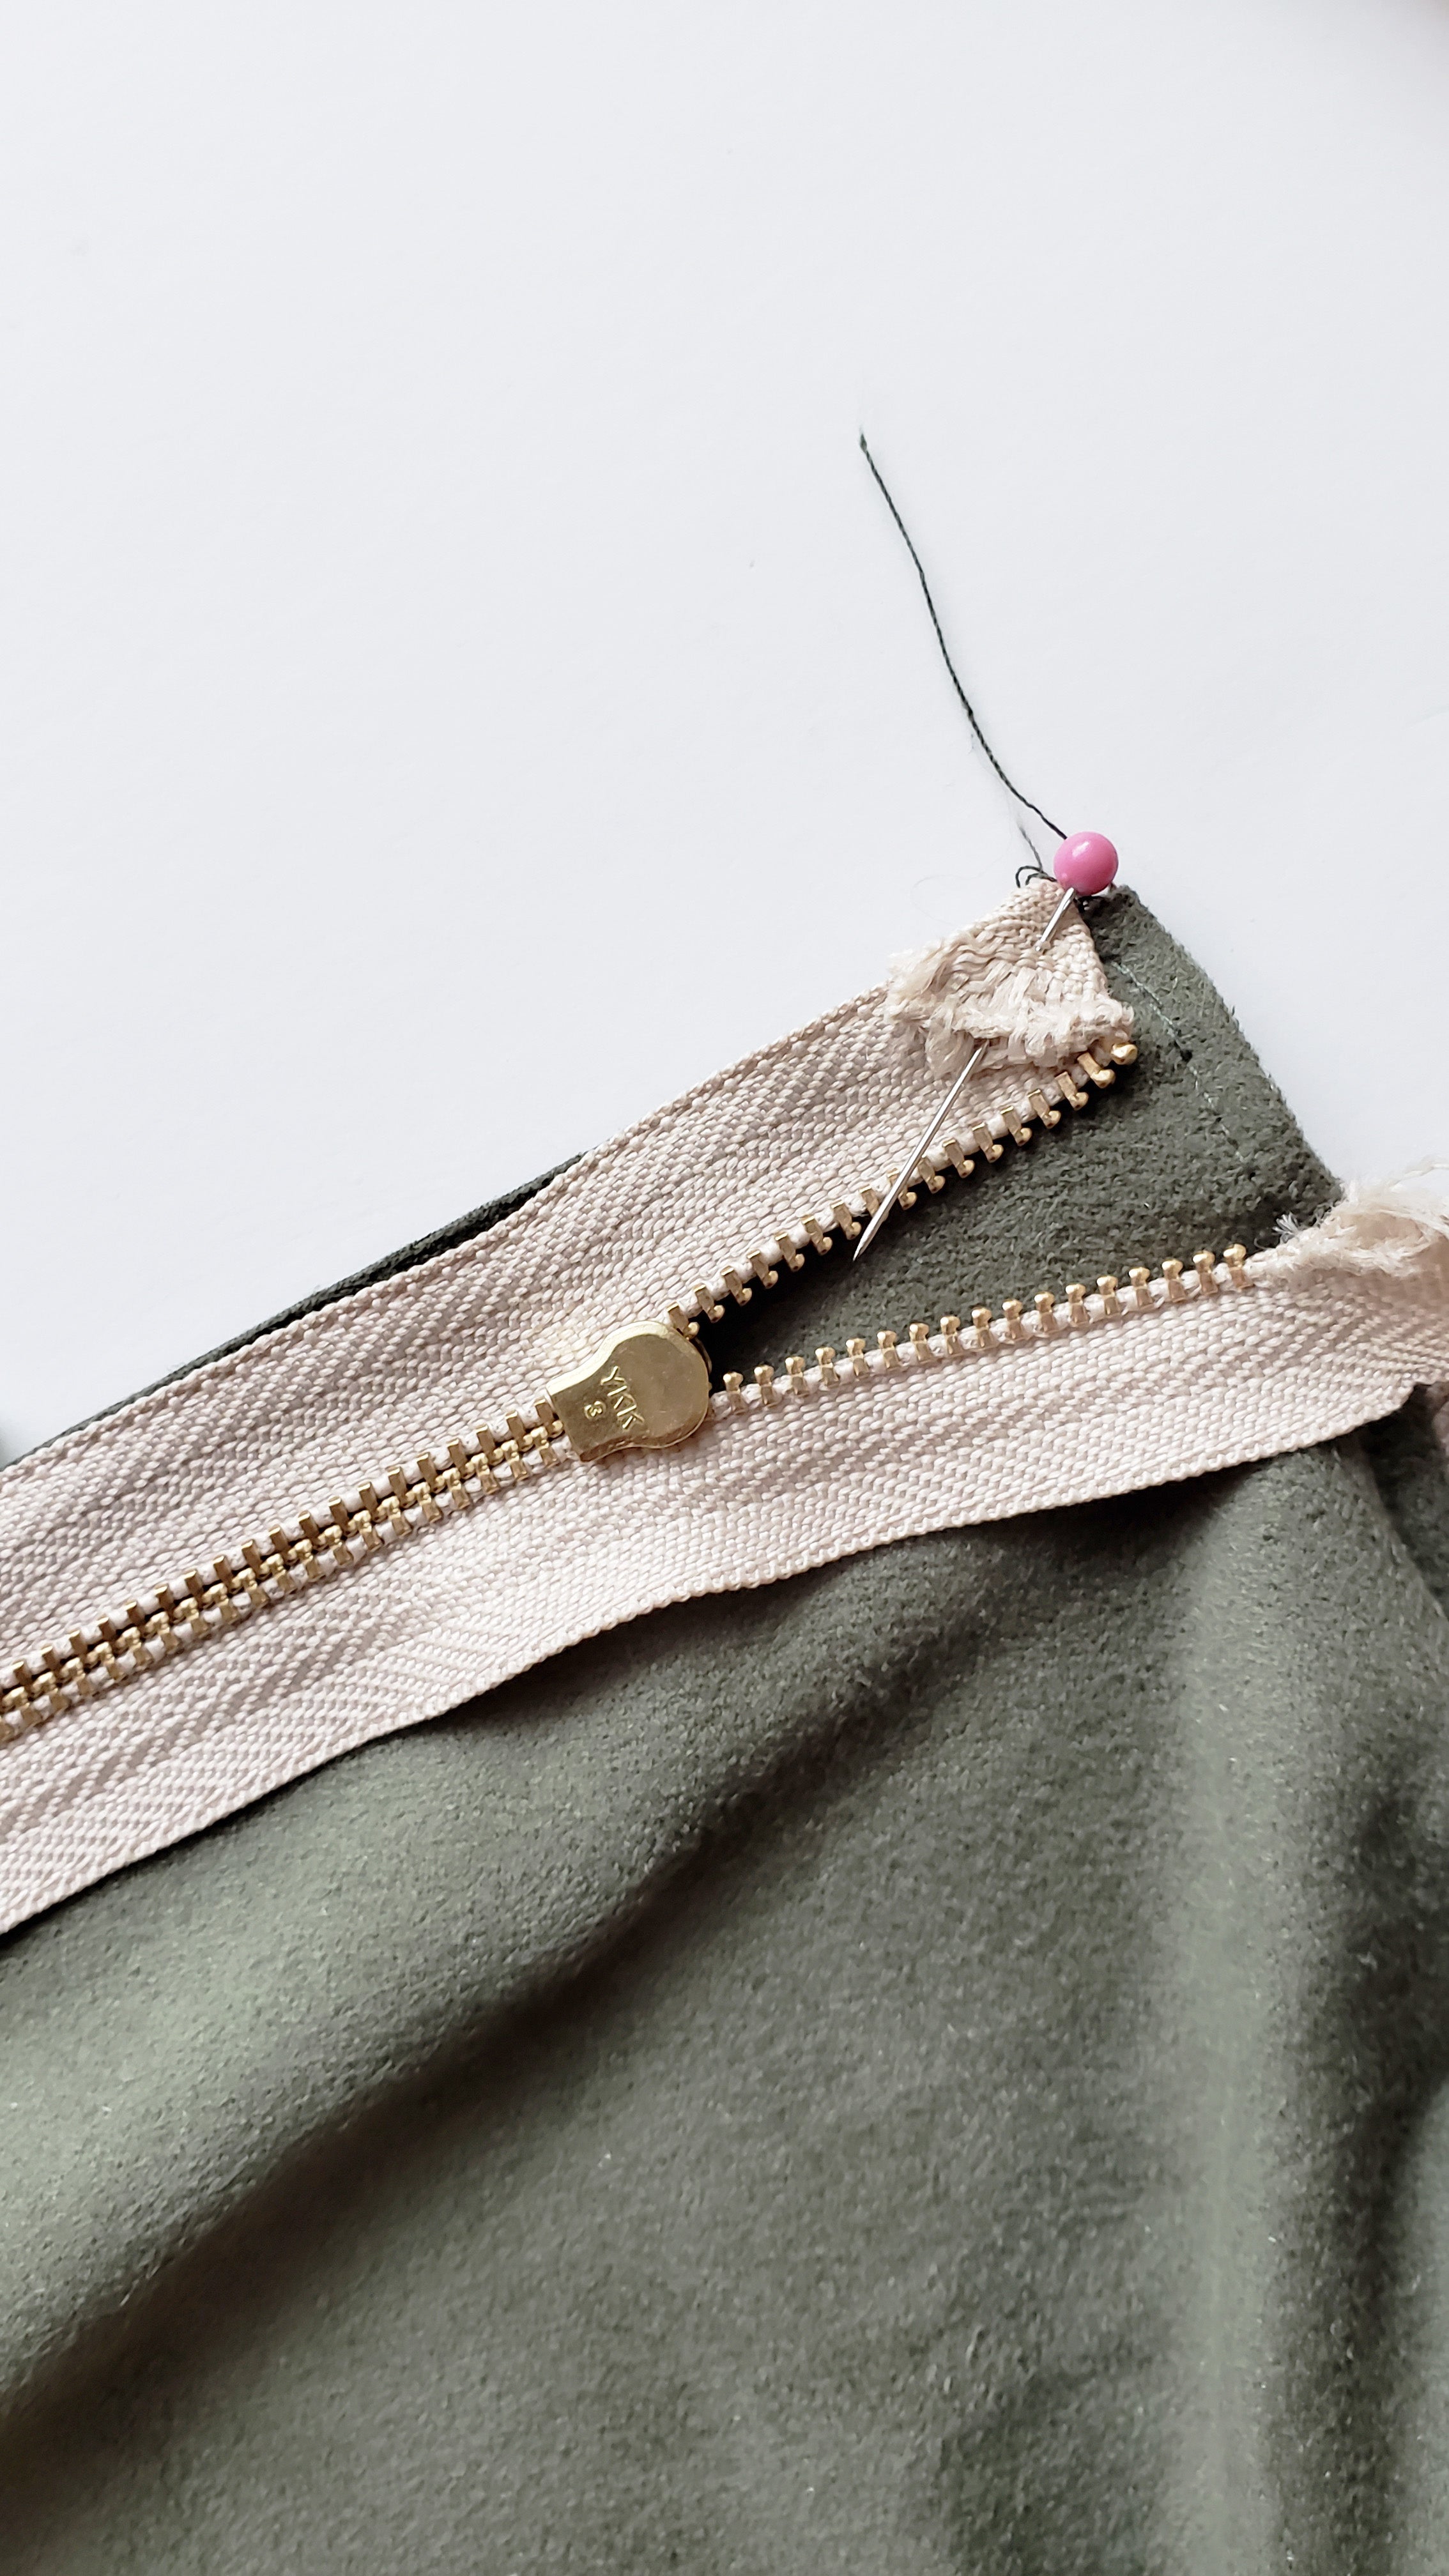
Once you’ve wrangled the zipper teeth off the zipper tape, you can add a new zipper stop to your zipper tape. But—you might be able to guess where I’m going with this—I didn’t have any of those! So I just decided to fold the end of the zipper down to prevent the zipper pull from zipping off the ends (which I’ll show in the next step).
Hey June Handmade also has a great tutorial for shortening both metal and nylon zippers here!


Lay the cardigan face up and align the zipper FACE DOWN along the edge of the front opening. Make sure the bottom edge of the zipper is lining up with the fold you pressed in the Hem Band, as this will be the bottom of the cardigan once everything is sewn in place. Try to also not pull on the knit fabric too much as you are lining things up to avoid stretching it out. Once you have it positioned, pin it in place (I like to pin on the zipper tape only on the side I am about to sew, so that I can unzip the other side of the zipper and get it out of the way).
Fold the top edge of the zipper tape down and pin in place as well. I have it shown folded toward you, but it actually works best to fold it under/away from you (makes a neater finish).

Use a zipper foot to sew the entire length of the zipper, catching the little fold at the top in your seam.
Next, fold the Hem Band over the bottom of the zipper and align the edge with the edge you sewed in the first step (you’ll be folding it in the opposite direction of the fold you pressed). Fold down the edge under the zipper to keep it clear of the zipper tape. Using a zipper foot again, sew the fold down in the same seam line from the first zipper seam.
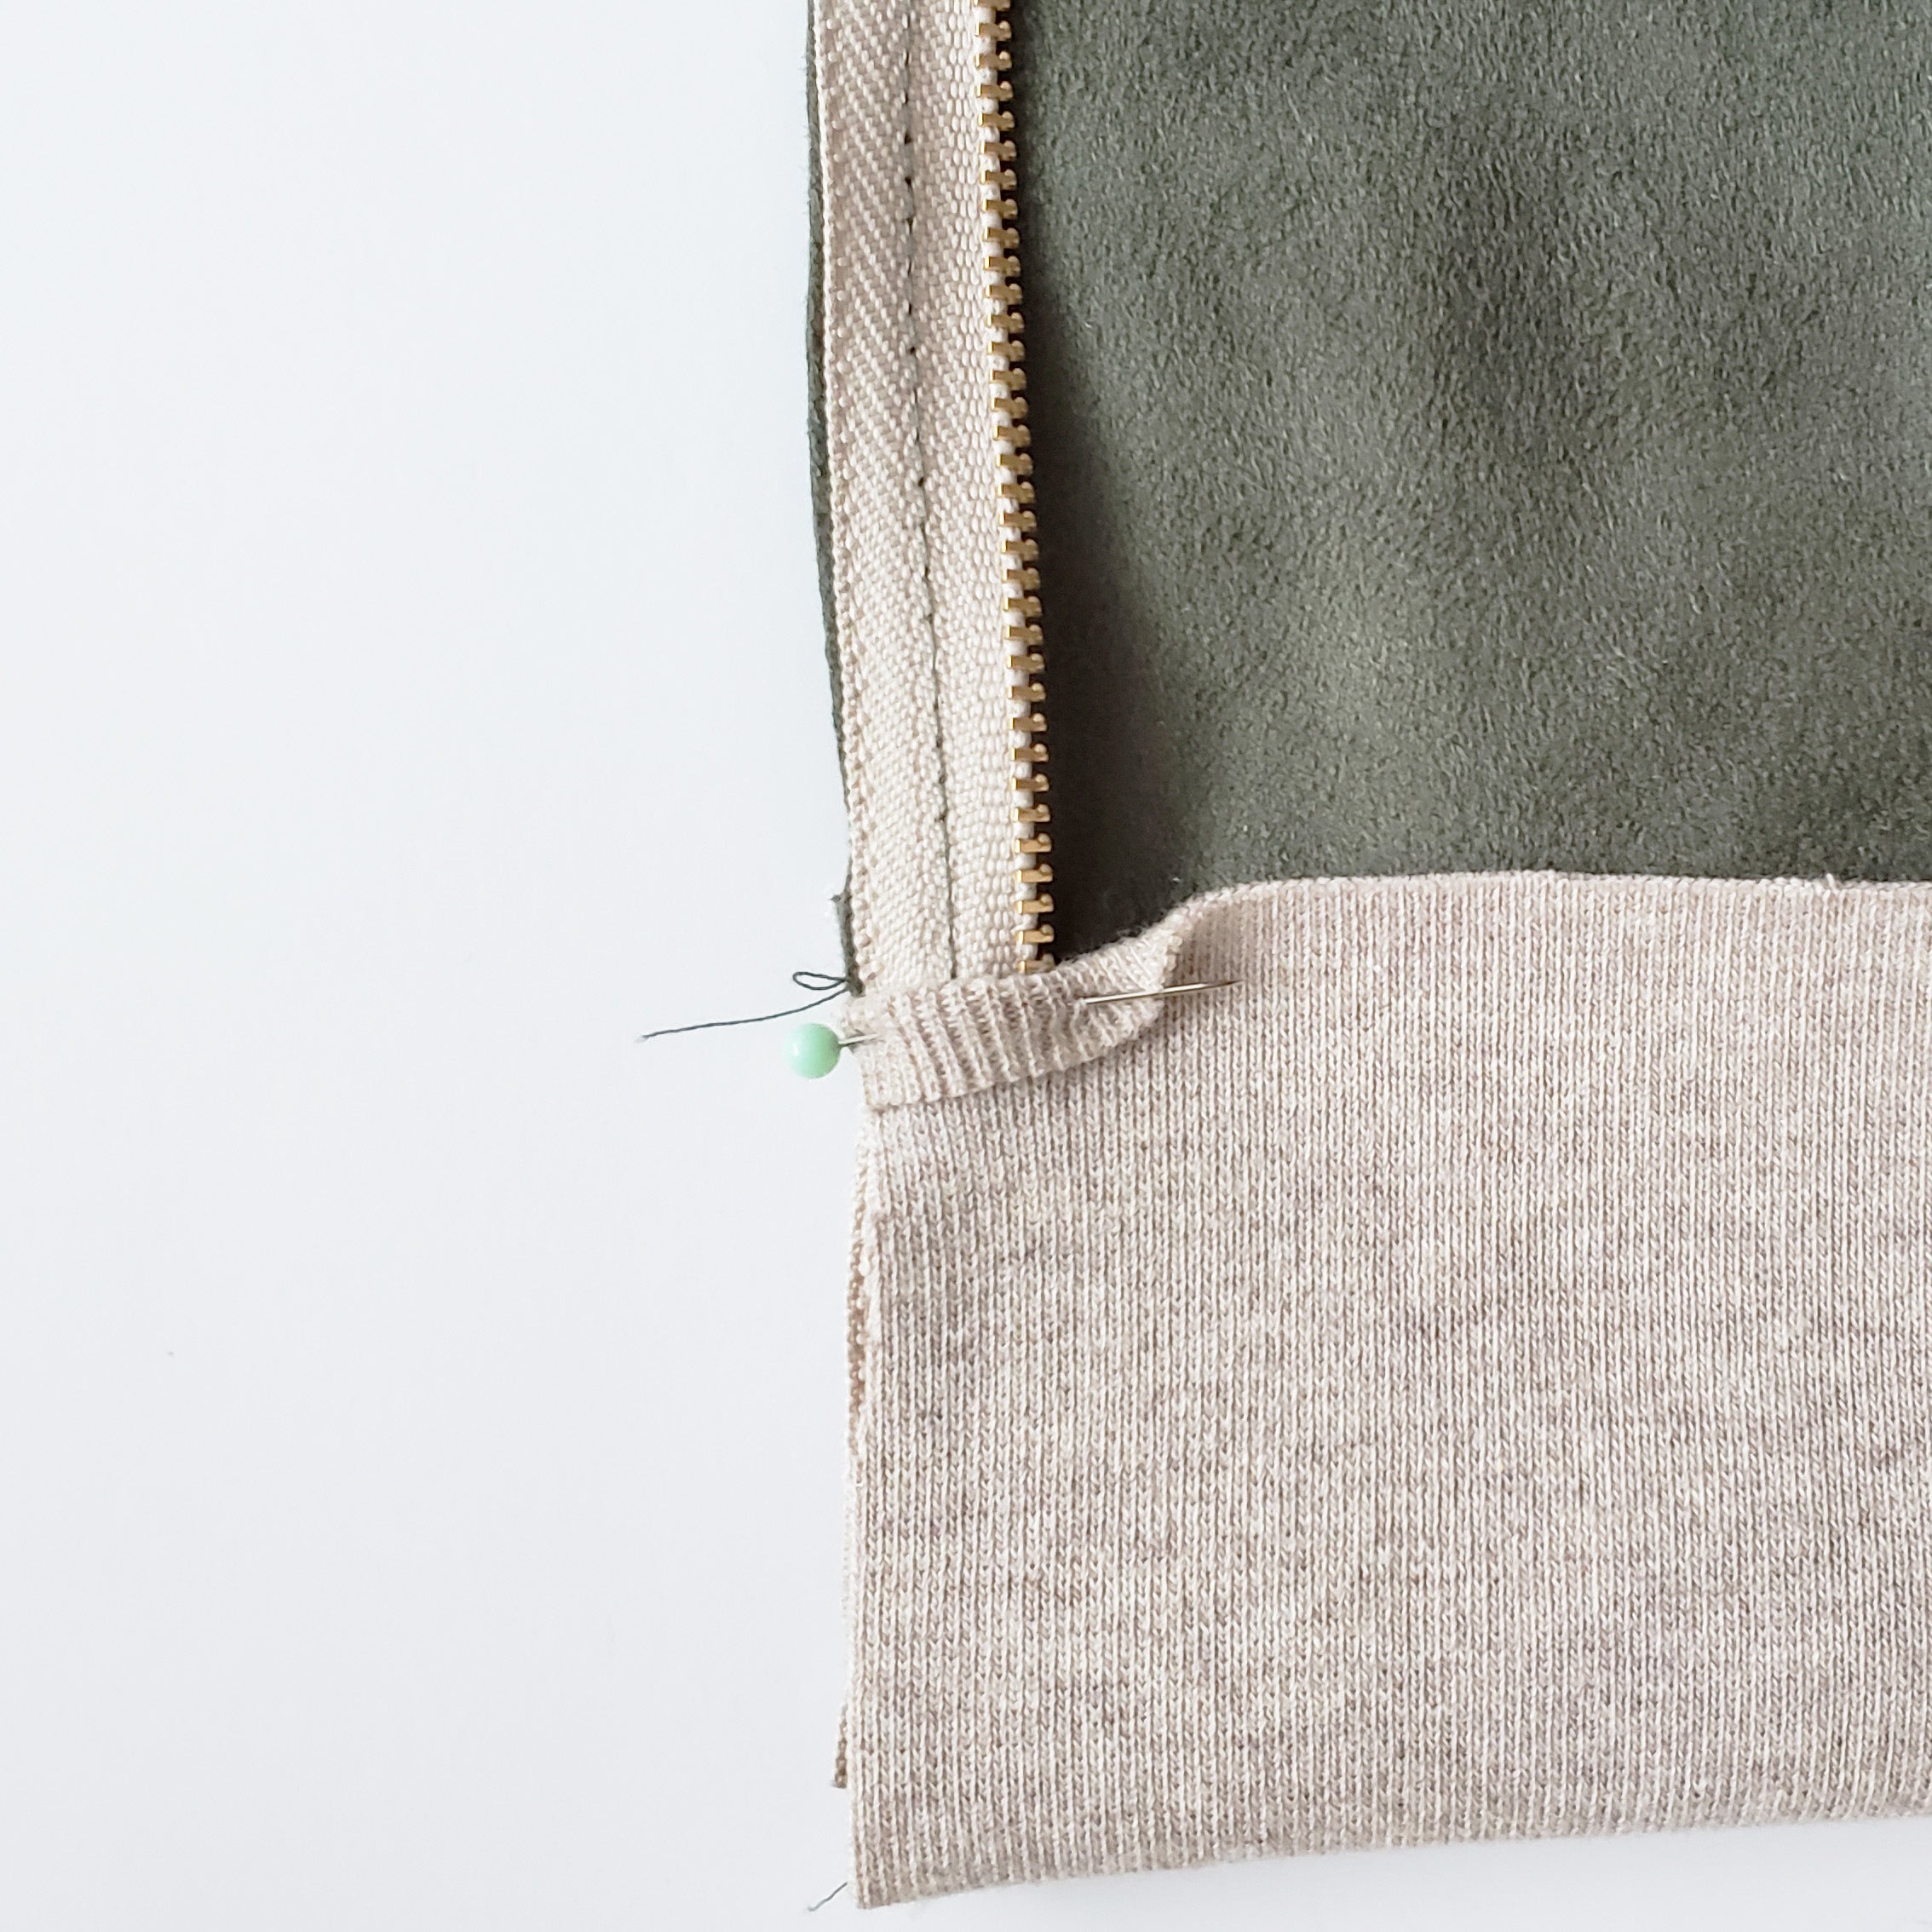
Flip the Hem Band corner right side out to reveal the zipper. Below is what it will look like from the exterior and interior of the cardigan.


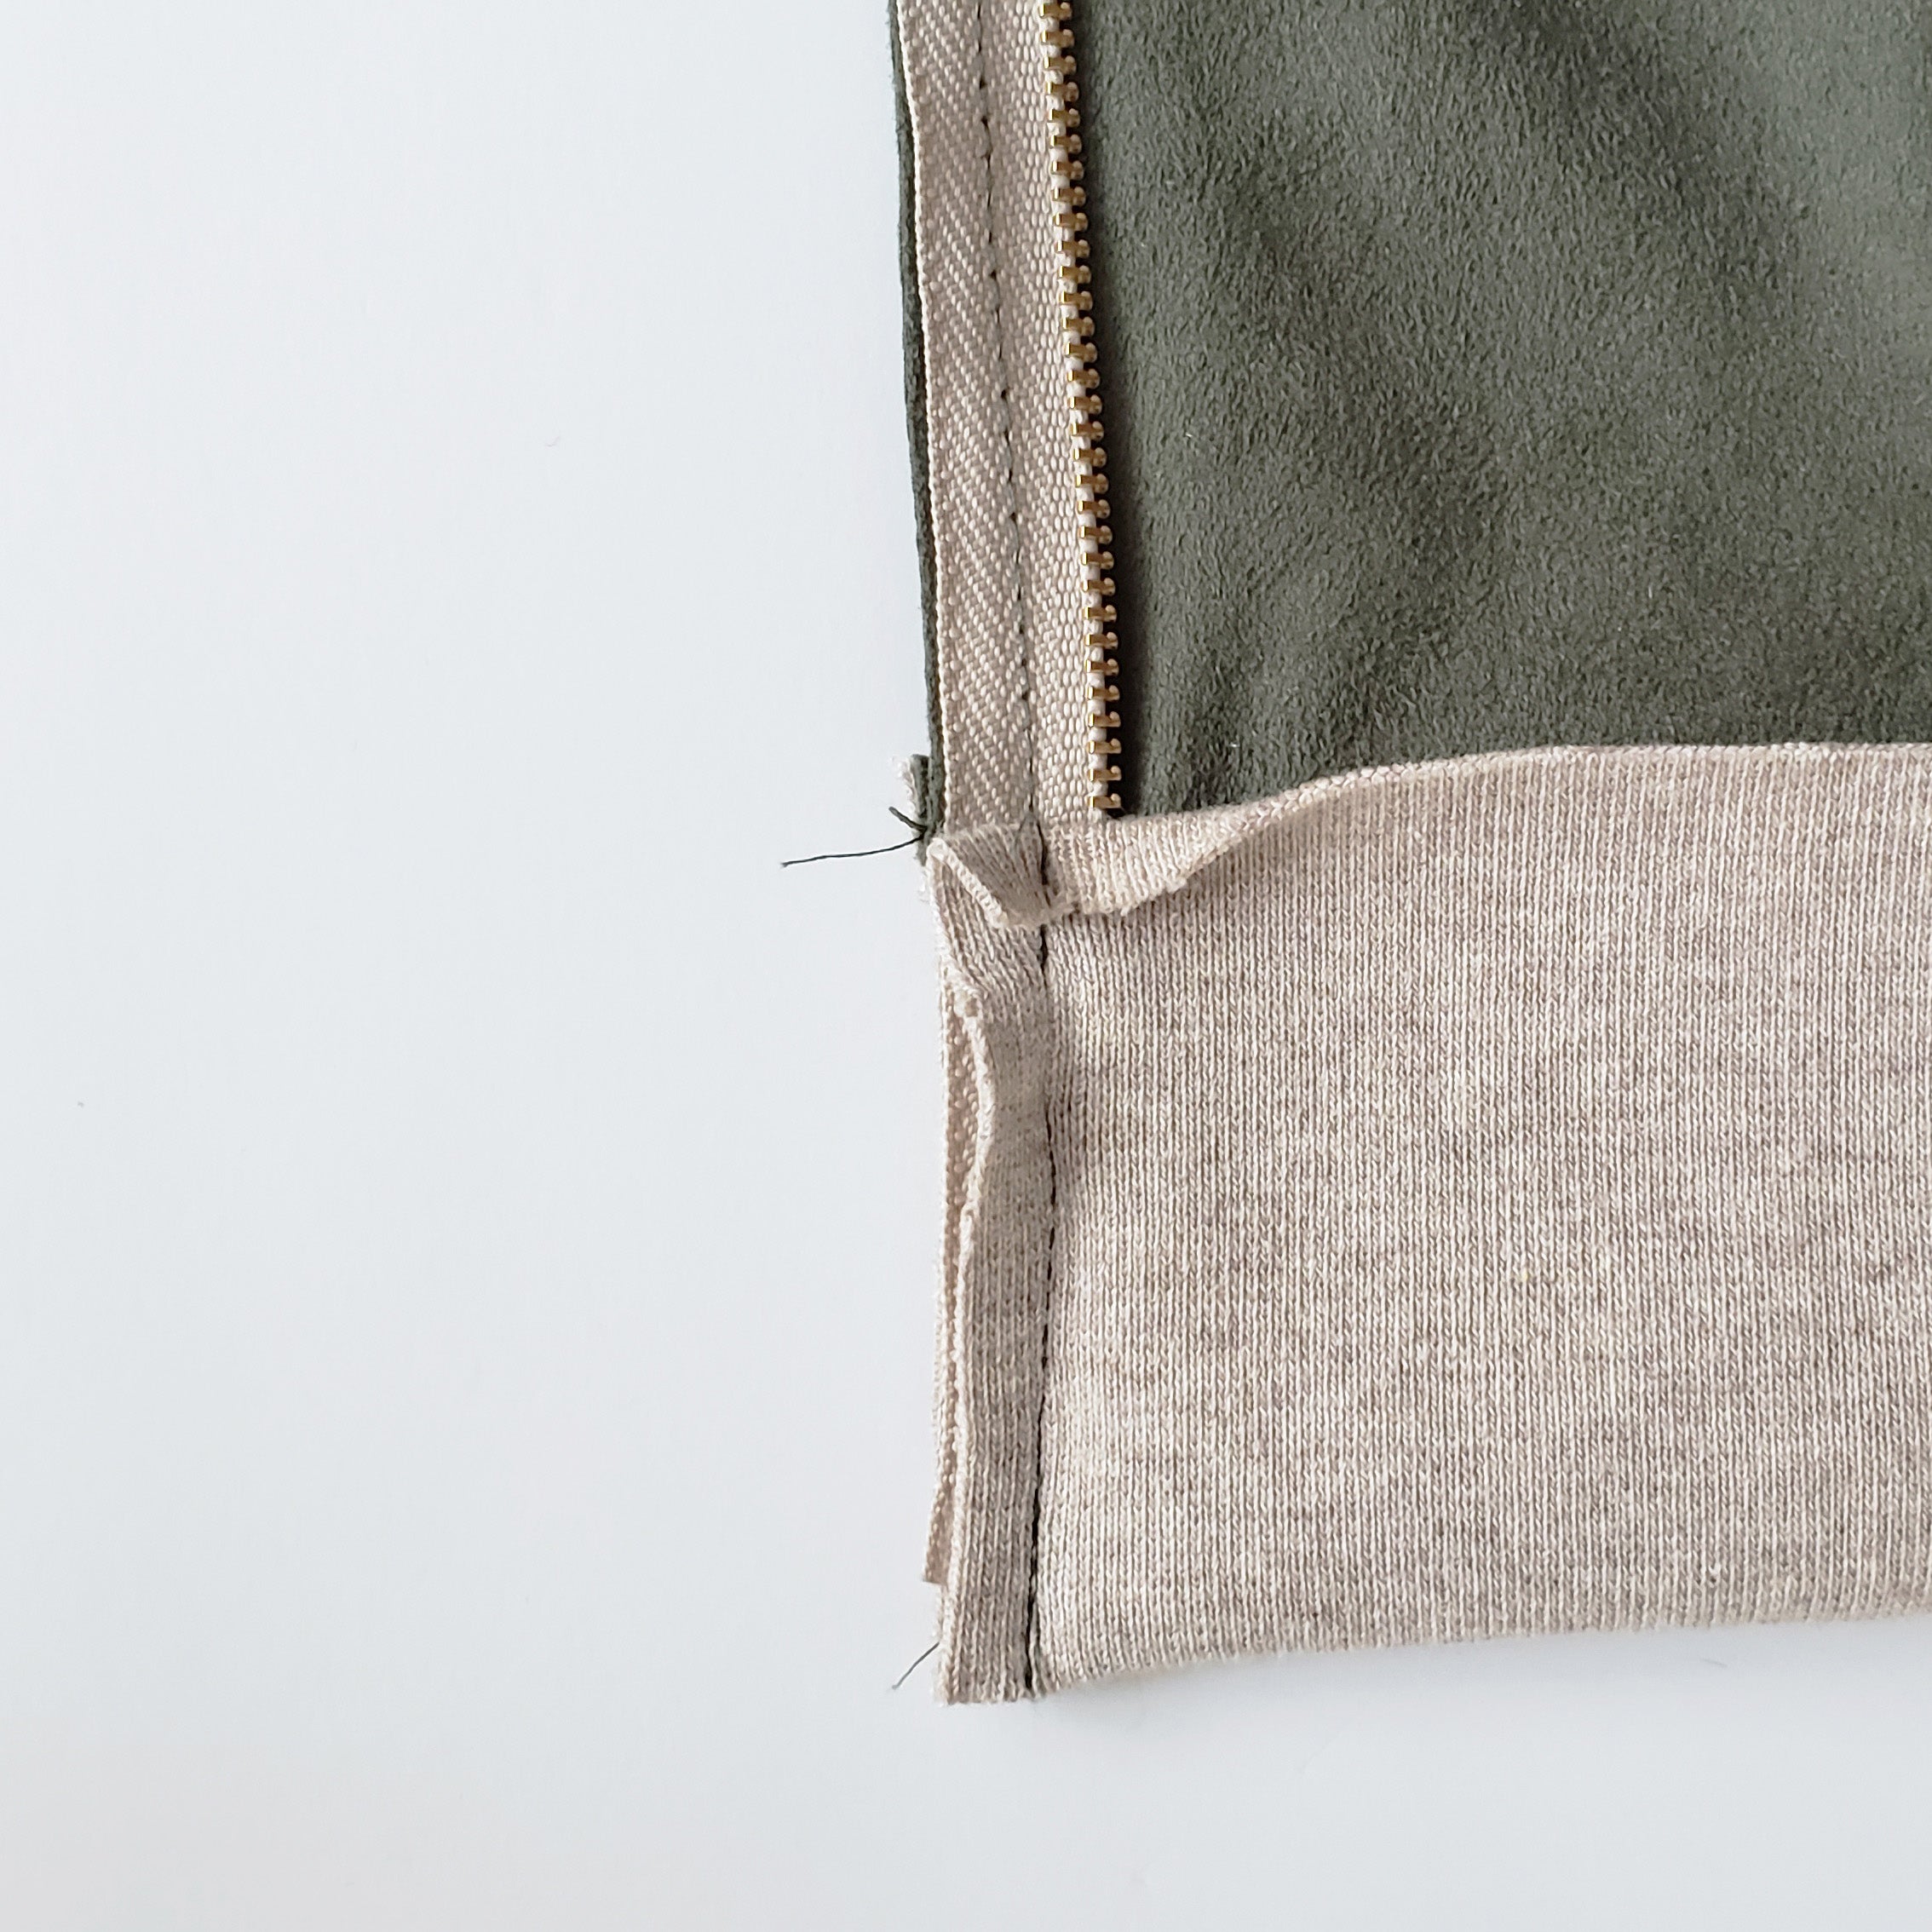
Press the Hem Band corner and flip the rest of the zipper to the exterior so the teeth are facing out and the zipper tape is folded to the interior of the cardigan. Topstitch along the edge of the fold along the zipper, making sure that the folded edge is not interfering with the zipper teeth. Stop the topstitching right at the top of the Hem Band.

Exterior

Interior
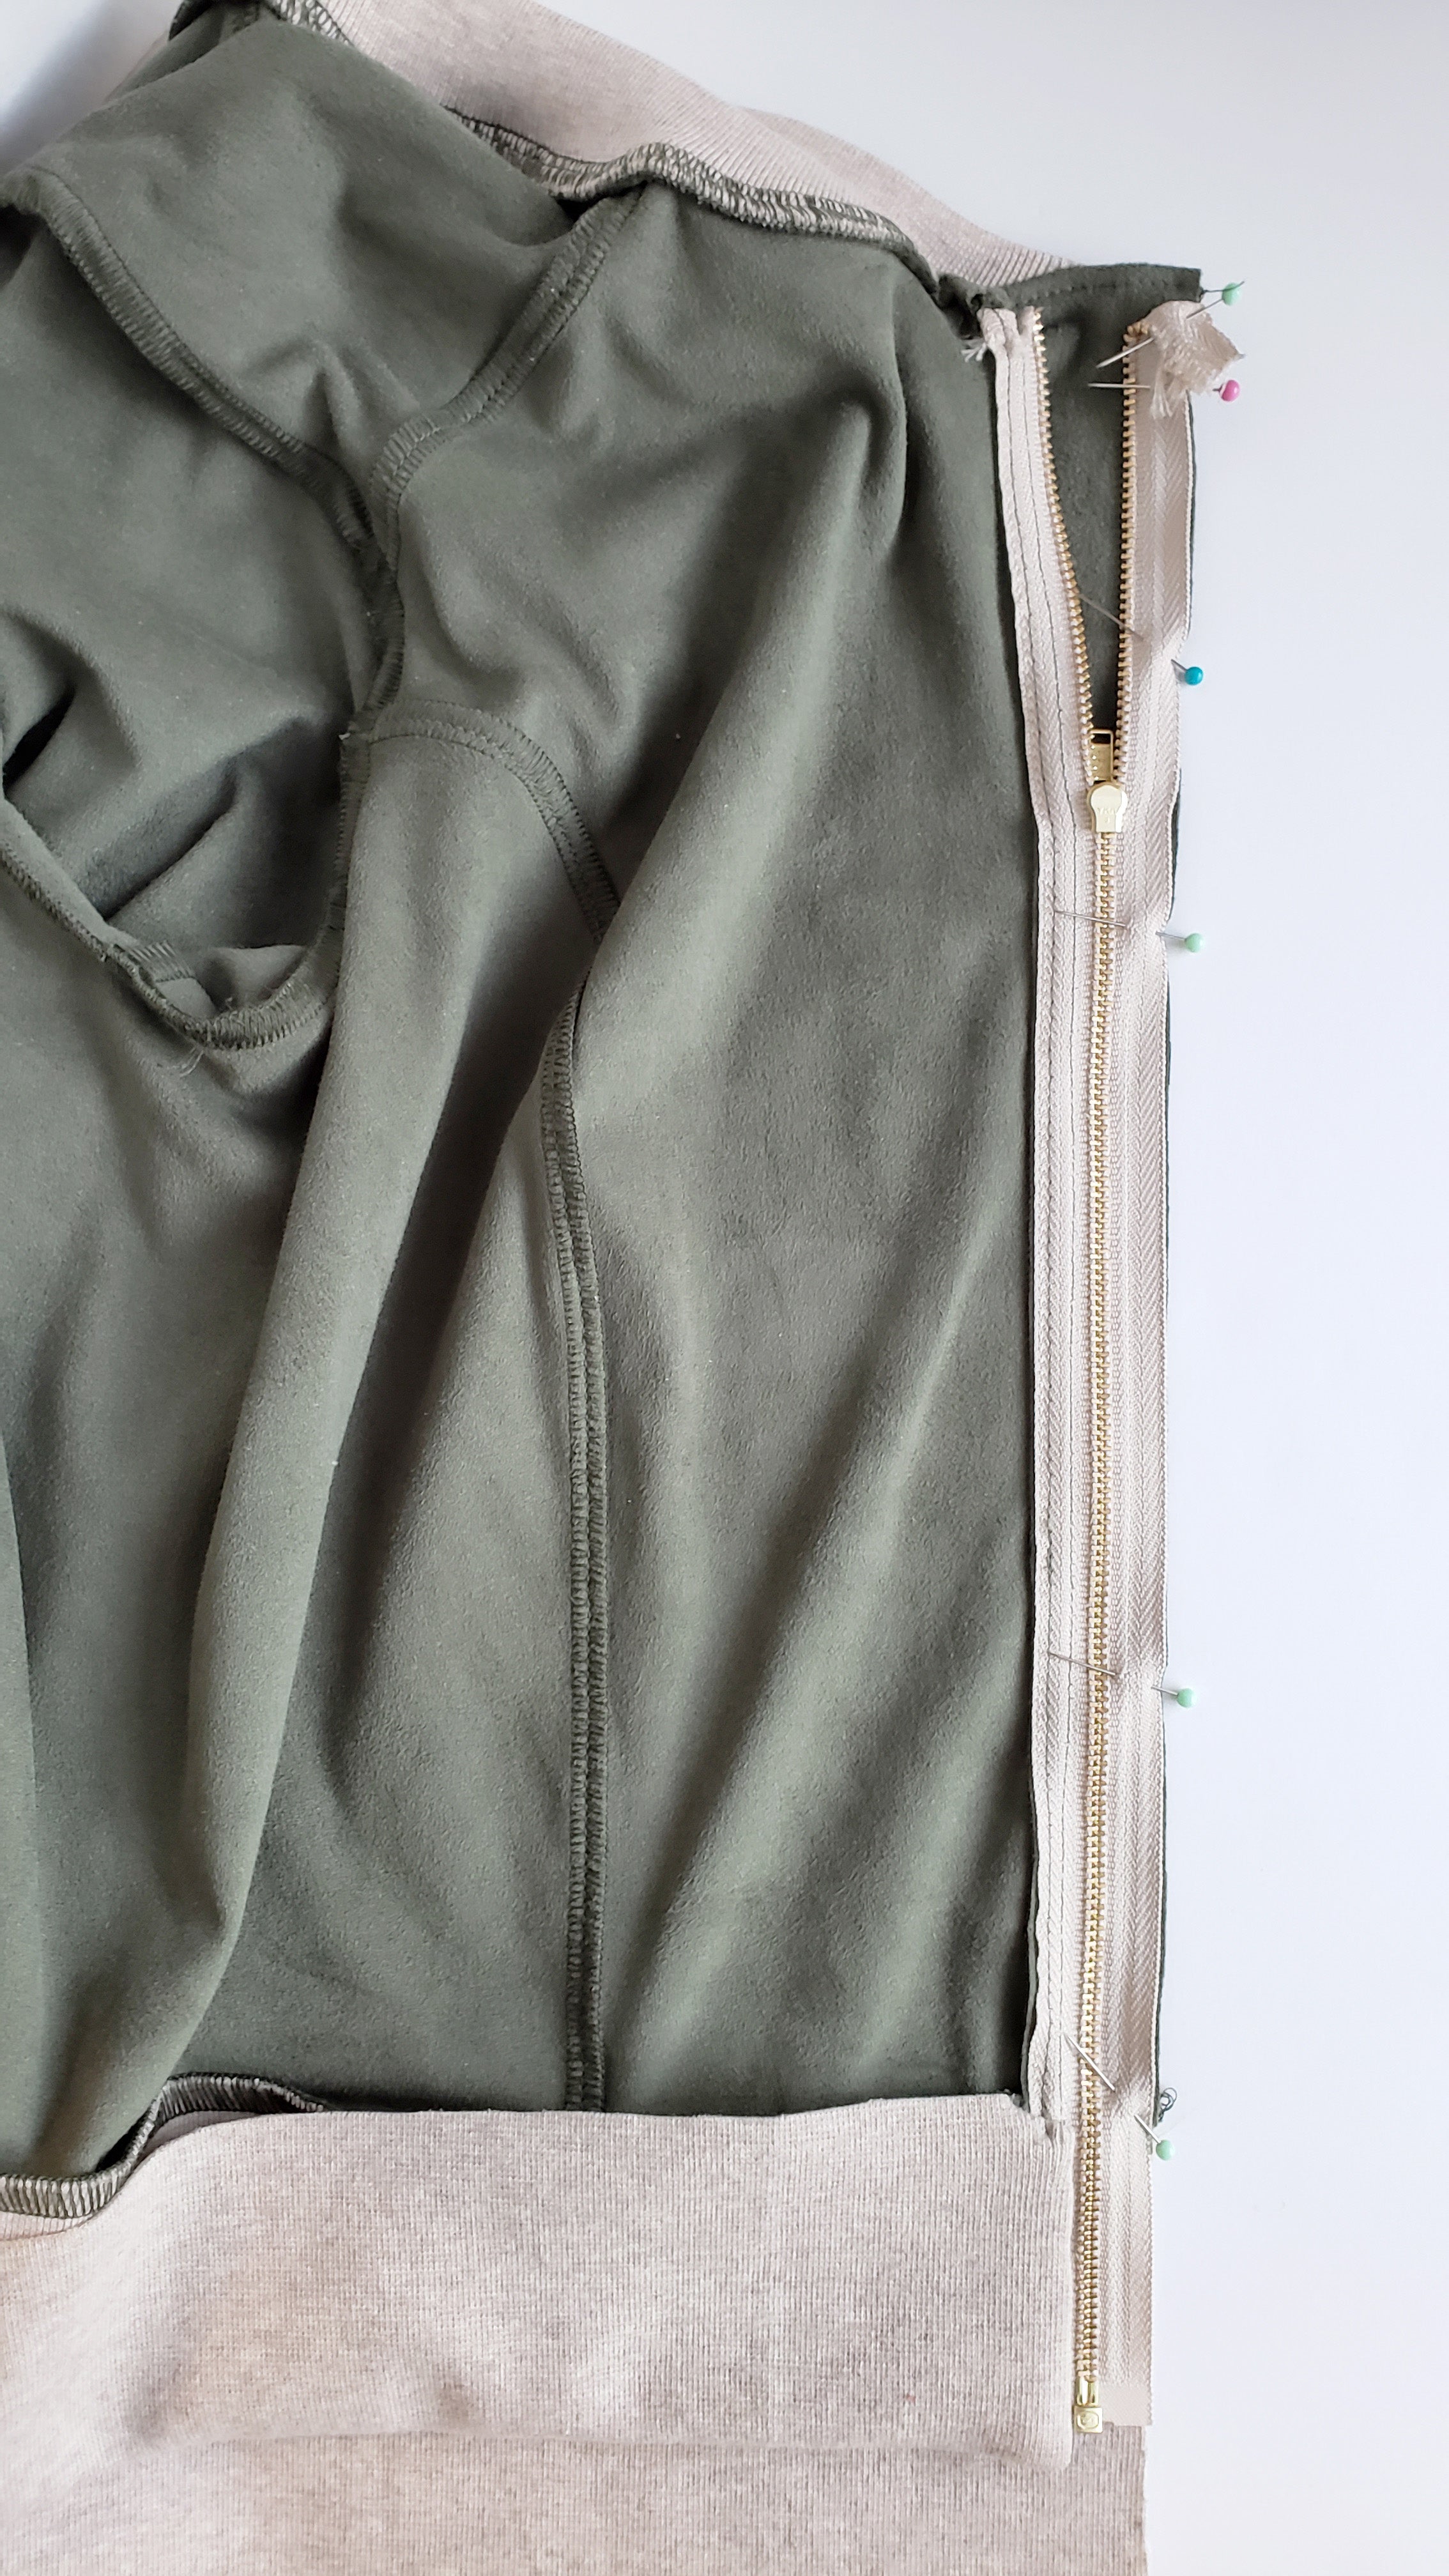
Zip the opposite side of the zipper tape back onto the side you just sewed and align it with the other side of the cardigan opening. The biggest thing here is to make sure that the two sides match up at the bottom edge, top of the Hem Band, and the neck opening. Once you have everything lined up, pin in place and sew the zipper in place with your sipper foot the same wya you did for the first side.
(Try to ignore my messy zipper trim! Even though I just pointed it out to you in my insecurity about it…Folding it under instead of over the top helps hide flaws such as this!)


Fold the Hem Band up over the zipper on this side the same way you did on the first side, and topstitch along the zipper edge again.

Now we can finish the Hem Band. From the interior/wrong side, align the edges of the Hem Band (the raw edge and the one that was sewn to the bodice at the beginning of this post). Flip the bodice out of the way and sew or serge the edges together, making sure to only sew the Hem Band edges. Sew the entire length (you’ll stop at the little folds near the zipper on either side).

Exterior


To put the finishing touch on the Hem Band, press the seam allowance toward the bodice and topstitch along the entire seam, from zipper to zipper.
