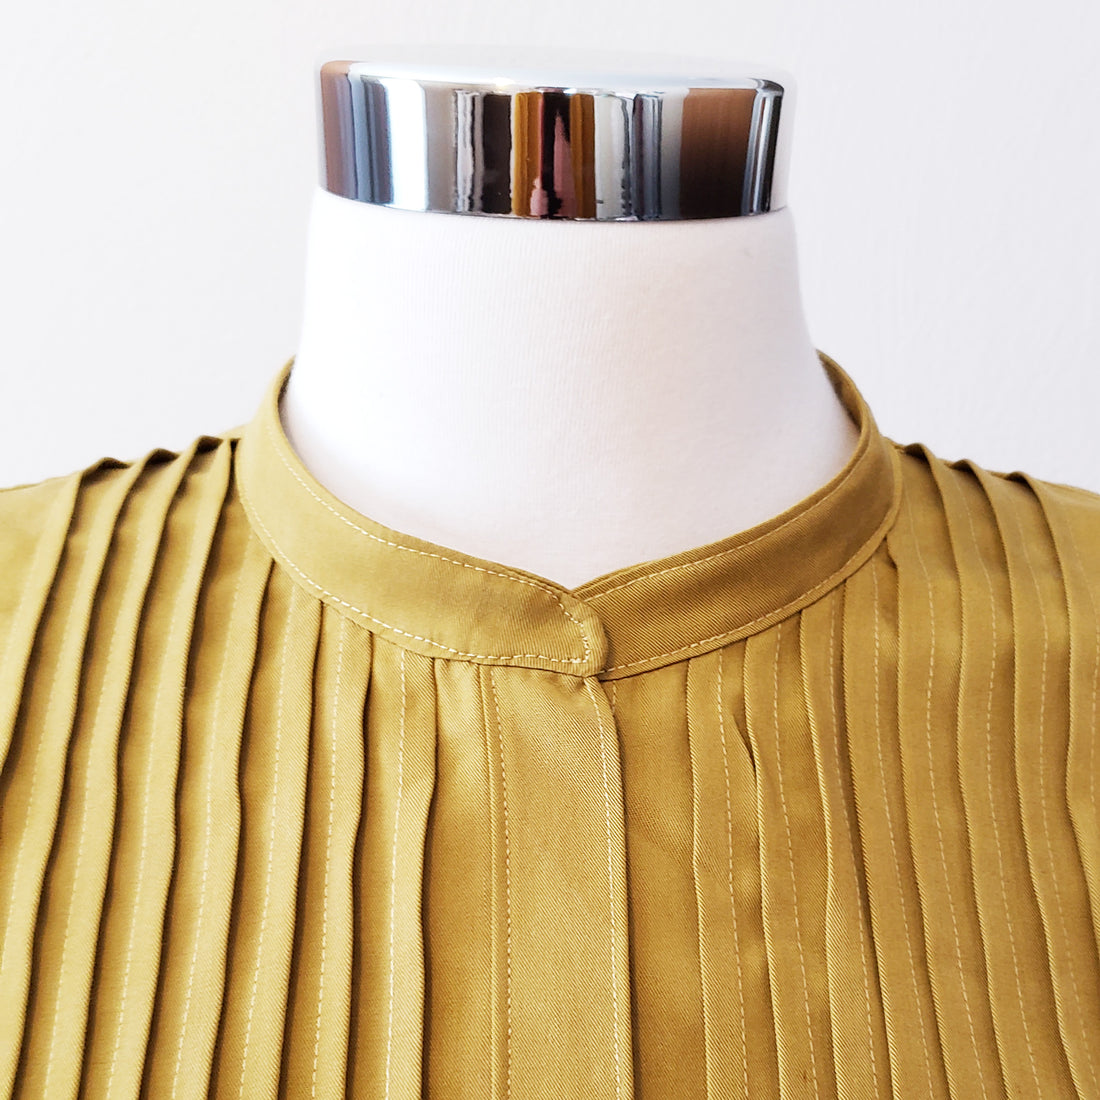
Byrdie Button-up Sewalong, Part 9: Installing a Band Collar
If you’re sewing Version B of the Byrdie Button-up, today’s post will show you how to install the Band Collar. This is a different pattern piece from the Collar Stand that has a slightly more narrow profile.
Prepare the Band Collar
Align the two Band Collar pieces right sides together, matching all the edges. Sew a 5/8” seam along the top curved edge of the band collar, starting and stopping 5/8” from the bottom edge on either side.

I’ve traced the seam allowance here as a guide:

Trim the seam allowance along the the top of the band collar assembly. Leave the seam allowance on the ends for now, we’ll trim it later.

Press the bottom edge of the interfaced side up by 5/8”.

Attach the Band Collar to the Bodice Neckline
Clip into the neckline at 1/2” increments, without clipping into the stay stitching. This will give the neckline a little more flexibility while you attach the collar.
Lay the bodice wrong side down, right side up, so that the neckline is spread open and flat. Flip the band collar assembly over so the the un-interfaced band collar piece is right sides together with the exterior of the bodice neckline. Pin the center of the band collar to the center of the neckline (make sure to only pin one side of the band collar to the neckline and that the interfaced side is out of the way).

Evenly distribute the band collar along the neckline, using many pins to keep everything aligned and in place. The band collar seam allowance will extend beyond the button plackets on either side. Again, keep the other side of the band collar flipped out of the way. You only want to sew one side to the neckline.

Sew the band collar to the bodice with a 5/8” seam allowance.

Here’s what it looks like from the interior of the bodice. The stay stitching along the neckline is inside the seam allowance.

Trim the seam allowance to about 1/4”.

Flip the band collar assembly up so that you can match the bottom edges of both band collar pieces on either side of the button placket. Sew straight down to close the end of the band collar next to the button placket (but do not sew through the button placket).

Next we are going to sew the ends of the band collar to create the start of a nice finished edge. To do this, you have to roll and compress the top of the button placket into the band collar so that you can attach it to the top of the button placket. Sew just enough of the end of the band collar to secure the top of the button placket in the band collar. You can see a quick video on Part 7 of the sewalong that shows how this works. Trim the seam allowance at the end of the band collar to about 1/4” (you’ll also want to trim the seam allowance on the bottom, right below the seam you just sewed, to reduce bulk for turning).


Turn the band collar right side out. Here’s what it looks like from the exterior and interior. Repeat these steps for the opposite side.


Shape and press the interior of the band collar to conceal the seam line with the edge fold of the collar.

From the exterior, pin the interior unsewn edge of the band collar in place, aligning it with the exterior bottom edge of the band collar as close as possible.

Here’s how it looks from the interior:

From the exterior, topstitch the bottom edge of the band collar, securing the interior of the band collar edge in the stitching.


Once you have the bottom edge sewn, press the collar again and topstitch the remaining perimeter of the collar to finish. Mine got a little wonky at the edge but it’s ok! I was using my new-to-me vintage machine that sews beautifully, and I’m still getting acquainted with the pacing and control of the machine in tight spots! :)

