Byrdie Button-up Sewalong, Part 3: Common Pattern Adjustments for Better Fit
If you’re reading this, it probably means you are sewing your own shirt, and therefore are likely familiar with the search for the perfect fitting button-up!
While perfection is a lofty goal (especially in a woven garment with set-in sleeves), the following pattern adjustments should get you pretty darn close for a comfortable fit in the Byrdie Button-up if you face any fitting challenges with the pattern as-is. I also always recommend doing a quick muslin—you can use the Version A pattern pieces to test the garment lengths and fit in the bust, shoulders, and sleeves for both versions.
Note: the following changes are demonstrated with the Version A pattern pieces, but the same adjustments apply to the Version B pattern pieces.
For the following adjustments, each reference to a “hinge” means that the pattern is cut up to—but not through—the seam line. Then the seam allowance is also clipped to the seam line, leaving about 1/16” or less of paper intact to create a hinge that allows you to rotate without disconnecting the pieces.
LENGTHENING/SHORTENING THE PATTERN
This is the first alteration I make to most patterns before any other adjustment is made. For the blouse and sleeve length adjustments, cut across the Lengthen/Shorten lines on the pattern and spread or overlap the pieces and true the side seams. To adjust the length of the dress and the Button Placket, simply lengthen or shorten from the bottom hemline. Make sure to also transfer bodice length adjustments to the Button Placket.

GRADING BETWEEN SIZES
This is possibly the easiest of pattern adjustments—just trace a smooth line between sizes to customize your fit. Do this for both front and back bodice pieces, or matching seams on other pattern pieces.

FULL BUST ADJUSTMENT (FBA)
The Byrdie Button-up pattern includes options for B, C, or D cup sizes to customize the fit right out of the virtual envelope. But if you need an additional FBA, you can do this with an adjustment to the Front Bodice Pattern Piece to add girth at the bust while maintaining the fit of the garment everywhere else.
Figure out the difference between the bust measurement of the size you chose in the pattern and your actual bust size. For example, the bust measurement for the size 20, D cup, is 48” (2” more than the B cup bust size of 46”). If your full bust measurement is 49”, you will add an inch to the overall bust circumference, or 1/2” to each side.
To add 1/2” to the pattern piece, use the cut and spread method to create hinge points at the armscye notch and the bust point. Cut from the hem straight up to bust point, then straight over to the notch at the armscye (stop at the seam line). Cut another line from the side seam to the bust point, bisecting the bust dart. Spread the wedges apart, rotating around the hinge points to add width. Tape extra paper to the pattern to secure, or retrace the entire pattern piece. Re draw the new dart from the original side notches to the new dart point (about 2” from the bust point, or bust apex).

SMALL BUST ADJUSTMENT (SBA)
If you need an SBA, one option is to eliminate the dart from the B cup Front Bodice Pattern piece. Doing so will require you to reduce the hem length of the front bodice by 1” to compensate for the length that would have been taken up by the dart. You’ll also want to reduce the side seam of the front bodice by 1/2” and cut a size smaller in the sleeve.
You can also do a traditional SBA by cutting to the same hinge points as the FBA, but instead of spreading the pieces apart, overlap them to reduce width at the bust.

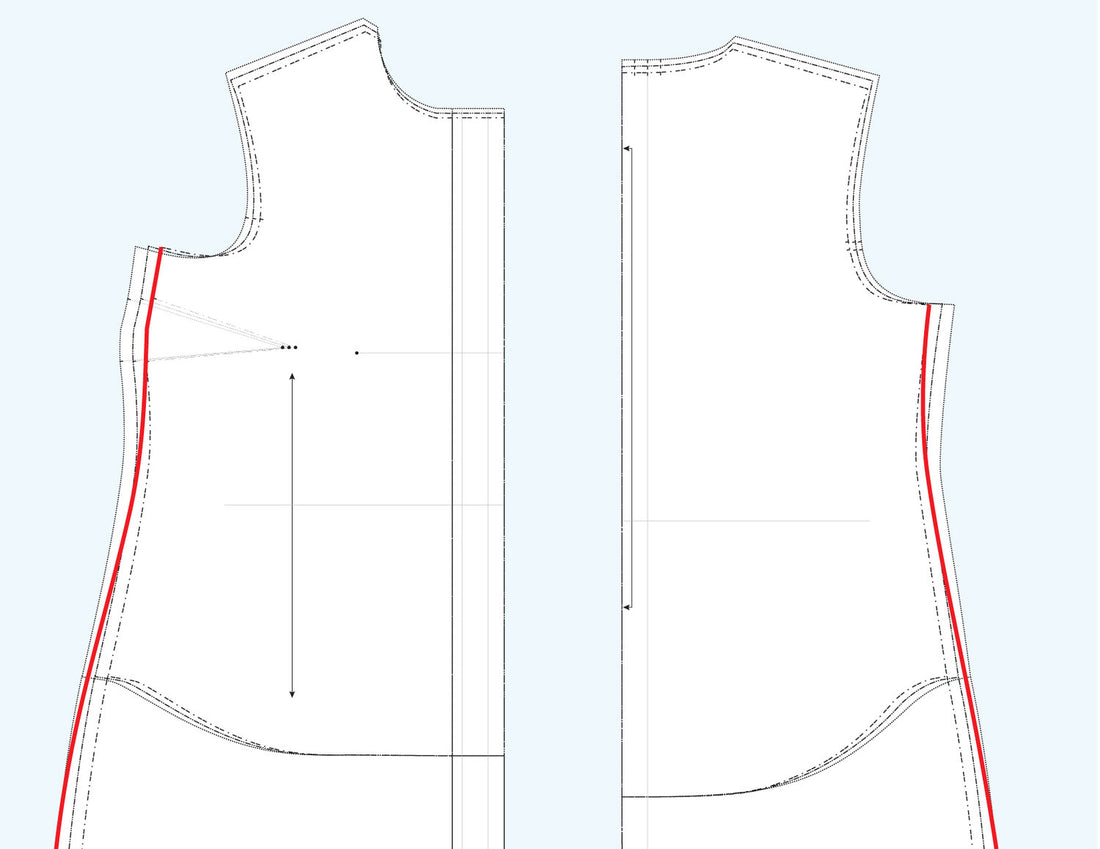
BROAD/NARROW BACK ADJUSTMENT
If you find that your shirts tend to pull across the back at the shoulder blades, you may need a broad back adjustment. You should be able to reach your arms straight forward without feeling substantial tugging and discomfort across the upper back bodice. The following adjustment can be made to the back bodice pattern piece to give a little extra room in the upper back.

BROAD/NARROW SHOULDER ADJUSTMENT
The Byrdie is drafted with a standard shoulder-to-sleeve seam that should sit right at the shoulder bone at the curve of the shoulder. If you find that it sits too far in or too far out away from the shoulder, the following adjustment should fix the issue.

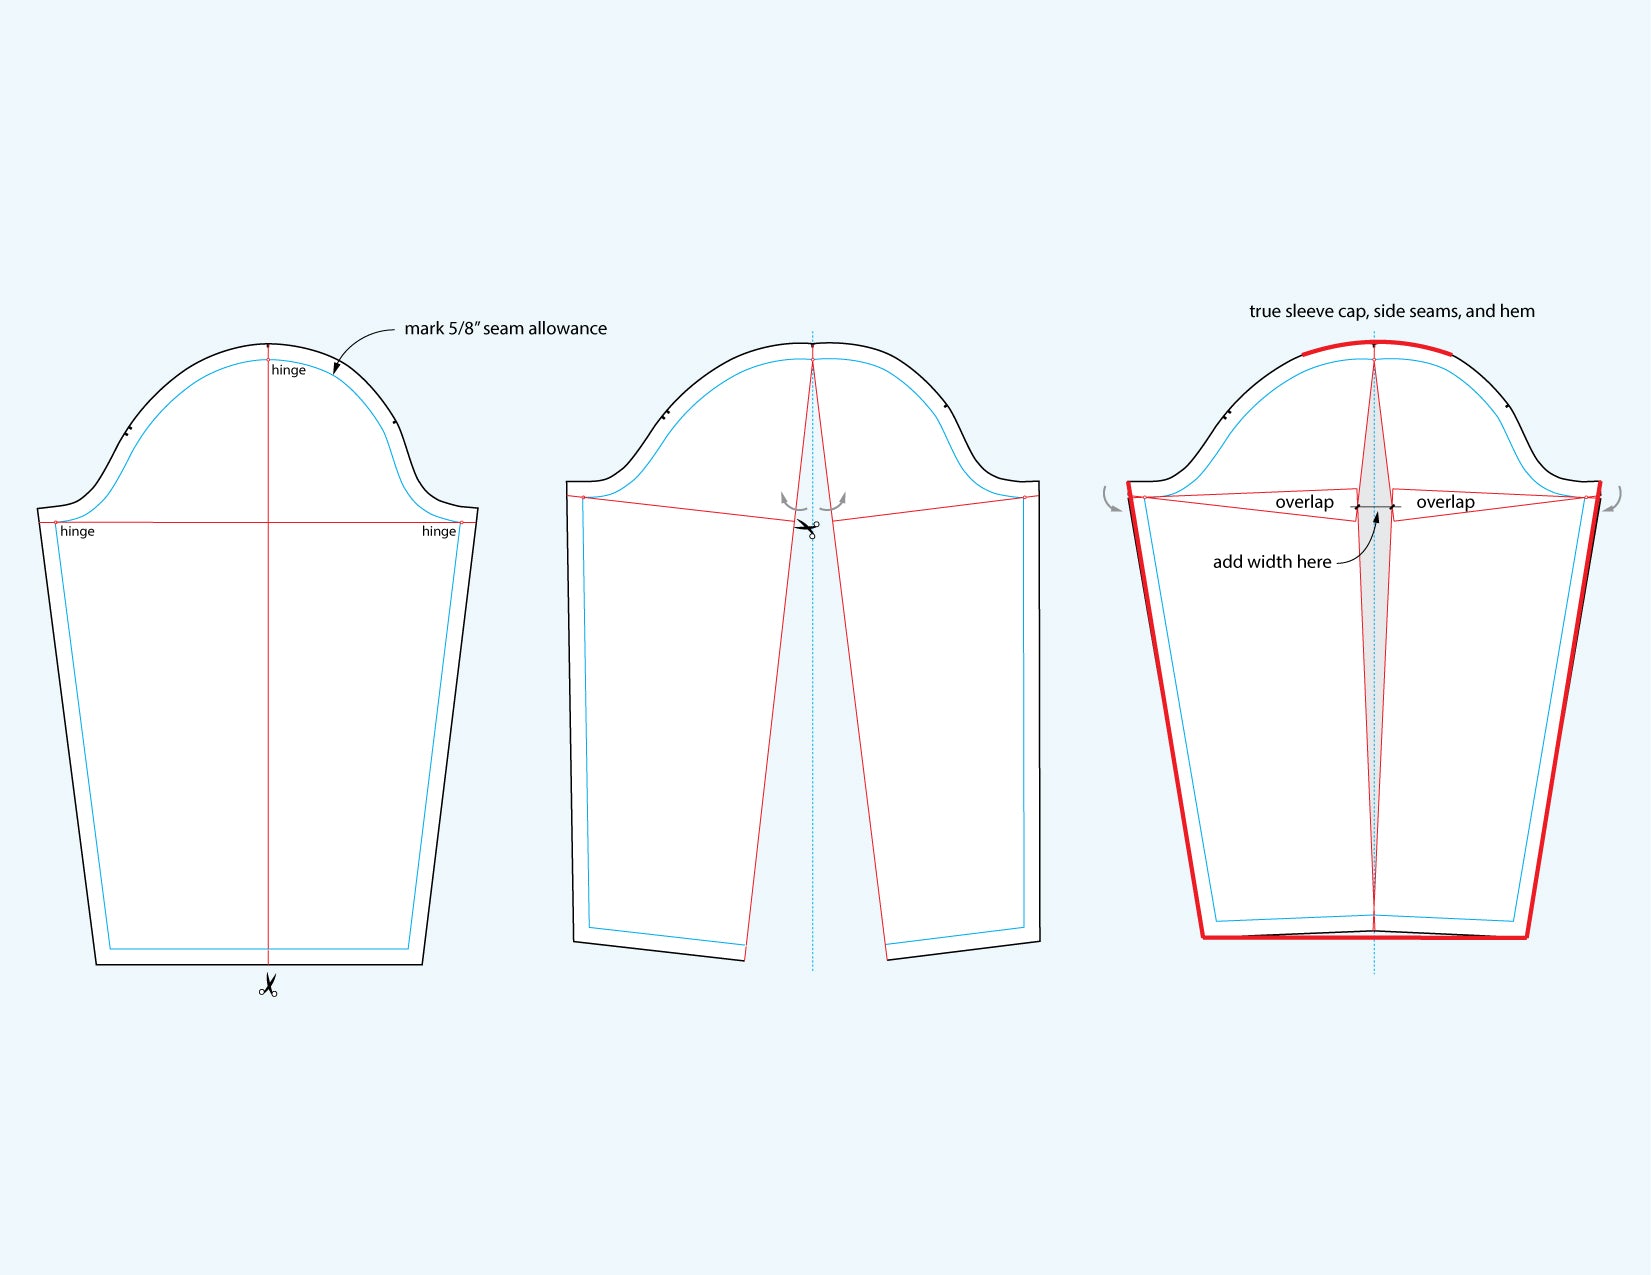
FULL BICEP ADJUSTMENT
A sleeve that is too tight in the bicep will affect the comfort and fit of the entire garment. To add width to the bicep without substantially altering the seam of the sleeve cap, make the following adjustment.